
Getting Around in GIMP - Adjusting Levels
In my previous post on Color Correction, I outlined a method for finding the lightest and darkest values in an image using Colors → Threshold. What I may not have mentioned in that post was that the process described will actually level balance your images for you automatically if you follow the steps (choosing the darkest and lightest pixel values to represent black and white in your image).
If you were just interested in basic level adjustments, I thought I would cover that here.

What Level Adjustments will do is allow you to change where the brightest and darkest pixels in your image are. I say brightest/darkest because Levels will allow you to change the relative value of pixels across your image. (Color correction should be approached using other methods).
This means that you can control the brightest and darkest pixel values across your entire image using only the Levels slider, and you can adjust the gamma. If you don’t adjust the middle level control, the response is linear across your image values. Let’s have a look at the Levels dialog to clarify some items:
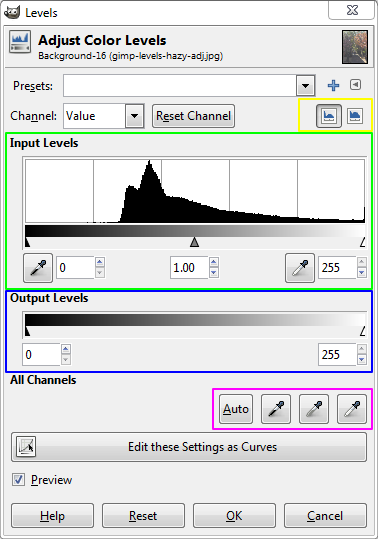
Input Levels - The range of values you want from the original image. The histogram represents the distribution of pixel values across your entire image from black (left) to white (right). There are three sliders just below the histogram. The far left slider adjusts where you want the darkest pixel values to be, the far right is the brightest pixel value location, and the middle slider is for gamma.
Output Levels - The range of values you want in your final image. The two sliders here are for the darkest and brightest values in your final output.
Auto, Pick Levels - The auto button, and the pick droppers for manually choosing where the different points should be in your image.
Adjustment via Sliders
Most of the time you will likely want a full range of values to be represented in your final image, so you will leave the output sliders set to the full range (0 - 255). You will make your adjustments entirely in the Input Levels portion of the dialog. You can approach this by using the histogram as a guide to where to set the sliders. The histogram is taller in places where there are a lot of pixels that represent that value. (For instance, if your image is overall very dark, the left side of the histogram will show taller than the rest).
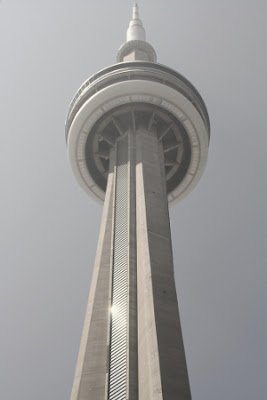
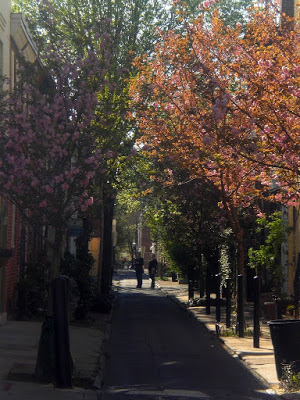
Looking at my sample levels dialog image above, you can see that there doesn’t appear to be many pixels at all in the darkest values. This is seen visually in an image as “washed out” blacks and dark values (this historgram is for the image of the trees and lane above). In this case you would grab the black point slider, and pull it to the right until you are approximately where the darkest values in your histogram begin. What you are doing here is “crushing” the darker pixels to black.
The same thing can be done for the brightest pixels by dragging the white point slider (far right) to the left. I normally leave the gamma alone unless it can produce good results. Usually it will wash out/crush the middle tones, but a slight bump in one direction or the other can sometimes help.
Adjustment via Manual Pick Points
This is a much more intuitive way of adjusting the levels in your image (and is the basis for my Color Correction tutorial). You will use the droppers to visually choose what should be the darkest/lightest/middle gray portions of your image.

The first button in this group is the “Auto” button. This will use GIMPs method of balancing the levels across your image, and will sometimes produce reasonable results. It doesn’t hurt to try it as you can always undo it if you don’t like it.
If it produces bad results or you just want more control, you can move on to the droppers. This is the method I will normally use most often if I’m playing with Levels only. The three droppers are for: Black Point, Middle Gray, and White Point respectively.
Each of the droppers work the same way. When you click on one, you activate it. Hovering your mouse over your current image should show your mouse pointer as an eyedropper tool. This means that wherever you pick in the image you are telling GIMP to make it either black, white, or middle gray (depending on which dropper you are using). GIMP will then adjust the levels in the image to match what you want.
If you have a point in your image that you either know is black (or want to be black), then click on the Black Point eyedropper, and click on the pixels in your image that should be black.
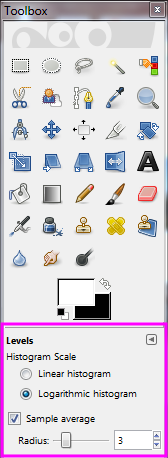
Now, by default, the picker will pick a sample from the pixel you choose, and will sample a radius around the pixel (3 by default I think). You can change the radius around the pixel to your liking by modifying the Radius under Sample Average in your Toolbox.
If you prefer single-pixel precision when setting a black/white/gray point, then simply un-check the Sample Average option in your toolbox. Now you can pick a single pixel to represent black/white/gray.
A final word on the gray point dropper, though. Usually you can easily find places on your photo where you expect a reasonable black or white value to be, and can easily use that as a pick point for the appropriate level. Middle gray is a little bit harder. You need to be sure that the pixels you are choosing really should represent middle gray in your image (RGB: 128 128 128). If they are not close, you will introduce a color cast in your image as GIMP will shift the RGB values to match middle gray where you pick!