
True PseudoGrey in GIMP
I was in the process of including my last tutorial on curves in some forum posts around the internet when I visited gimpchat.com again. After I had posted my link I was perusing the tutorials board when I came across user lylejk’s post about implementing a true pseudo-grey on images in GIMP.

It was an interesting read, but the thing that started me thinking was the implementation. It was a manual implementation in his tutorial, and I figured I could slap together some script-fu to automate the process.
The basic premise behind this idea as originally presented by Rich Franzen ( ) is to start with an 8-bit value for a pixel, then successive addition of 1 to either no channels, red, blue, green, red-blue, red-green, or blue-green would encode further grey values.
This will increase the maximum number of unique values in an image to 1786 different values, vs. the 256 different values of a straight 8-bit grayscale image.
This means that in a straight 256 value grayscale image, we could go from value 128 to 129 like so:
But with PseudoGrey, we can now encode much more information between those two values (thank you Saulgoode for correcting my encoding sequence!):
Now, it might be debatable on whether a person could really see a distinction even in 256 values, but the bottom line is that you can have much more data to work from and retain using PseudoGrey. (To illustrate the “debatable” idea - each of the lines above is actually that RGB color as indicated - can you tell the difference between them?)


The implementation that lylejk sorted out for GIMP is to use a black to white linear gradient as a layer in your image. I personally just created a new layer that was 2048 pixels wide, and about 10 pixels tall, then filled it with a gradient from black to white from/to the extents, taking up the entire layer.
If you do this, then have a look at the colorcube analysis:
Colors → Info → Colorcube Analysis
you’ll notice that your gradient layer should report around 1786 unique colors. (For reference, I’ll fill the layer with the black→white gradient with “Dithering” turned on in the Blend mode).
You now have a smooth black to white gradient with 1786 individual tones. Now you can just do a:
Colors → Map → Samples Colorize…
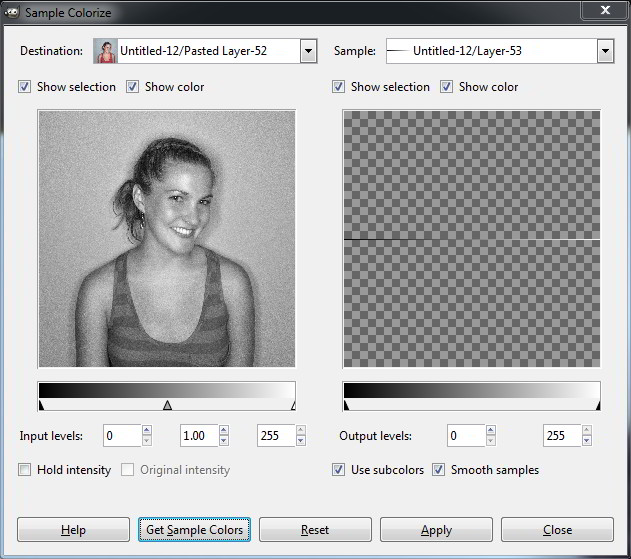
The Destination image will be your image that you want to convert to PseudoGrey, and your Sample will be your gradient layer. You’ll want to make sure that “Hold Intensity” and “Original Intensity” are both unchecked, and that “Use subcolors” is checked.
Then just hit “Get Sample Colors”, then “Apply” to remap your color image to PseudoGrey.
If you pixel peep your image now, you’ll notice that it’s mostly grayscale values (R,G,B all match values), but you’ll also notice that there will be pixels whose R,G, or B value is just 1 off from the rest! PseudoGrey!
The thing is, this is a bunch of work. So what ruined my lunch hour was whipping up a script-fu to automate this process for me!
This script will create a new layer in your image that is 2048x10 pixels, then fill it with the appropriate black to white gradient. It will then call Samples Colorize… with the correct options for you, and will then remap your current layers colors to Pseudogrey.
Update
I forgot to mention this in the post above, but after you run the PseudoGrey script, you can view all the extra tonal data you are saving by running: Colors → Maximum RGB… This will shift all of the subtle color different pixels to their maximum, making them very visible. All of those colored pixels now represent luminosity tones that you are saving above the 256 of a straight grayscale conversion!
Update
I’ve also written up the encoding in pure javascript that run entirely in the browser on your client side (no images are actually uploaded anywhere - it’s converted entirely locally in your own browser). If you want to try it out, see here:
Javascript PseudoGrey Converter
This has a bug that does not produce expected results…