
Focus Stacking Macro Photos (Enfuse)
I recently got a new camera to update my aging (gracefully!) Olympus E-P1. Deciding to stay with the µ4⁄3rds (or µ43rds, or micro four-thirds - I just wanted to play with some HTML entity codes), I found a really tasty new Olympus OM-D E-M5 waiting for me for Christmas! In deciding which kit lens to go ahead and get with it, the Olympus M.ZUIKO DIGITAL ED 12-50mm F3.5-6.3 EZ was a no brainer. Water-resistant (to match the camera), and a neat macro function!
This article is about focus stacking, for exposure blending, see here: Automatic Exposure Blending with Enfuse (HDR-ish)
Well, I couldn’t help but snap a couple of macro shots of my trusty Warhammer 40k Space Marine to play with this newfangled lens.
The problem, if you haven’t done macro photography before, is that the depth of field will become razor-thin. You can alleviate it a bit by closing down the aperture a bit, but at some point you’ll hit diffraction limits (and reduced sharpness).
Focus Stacking
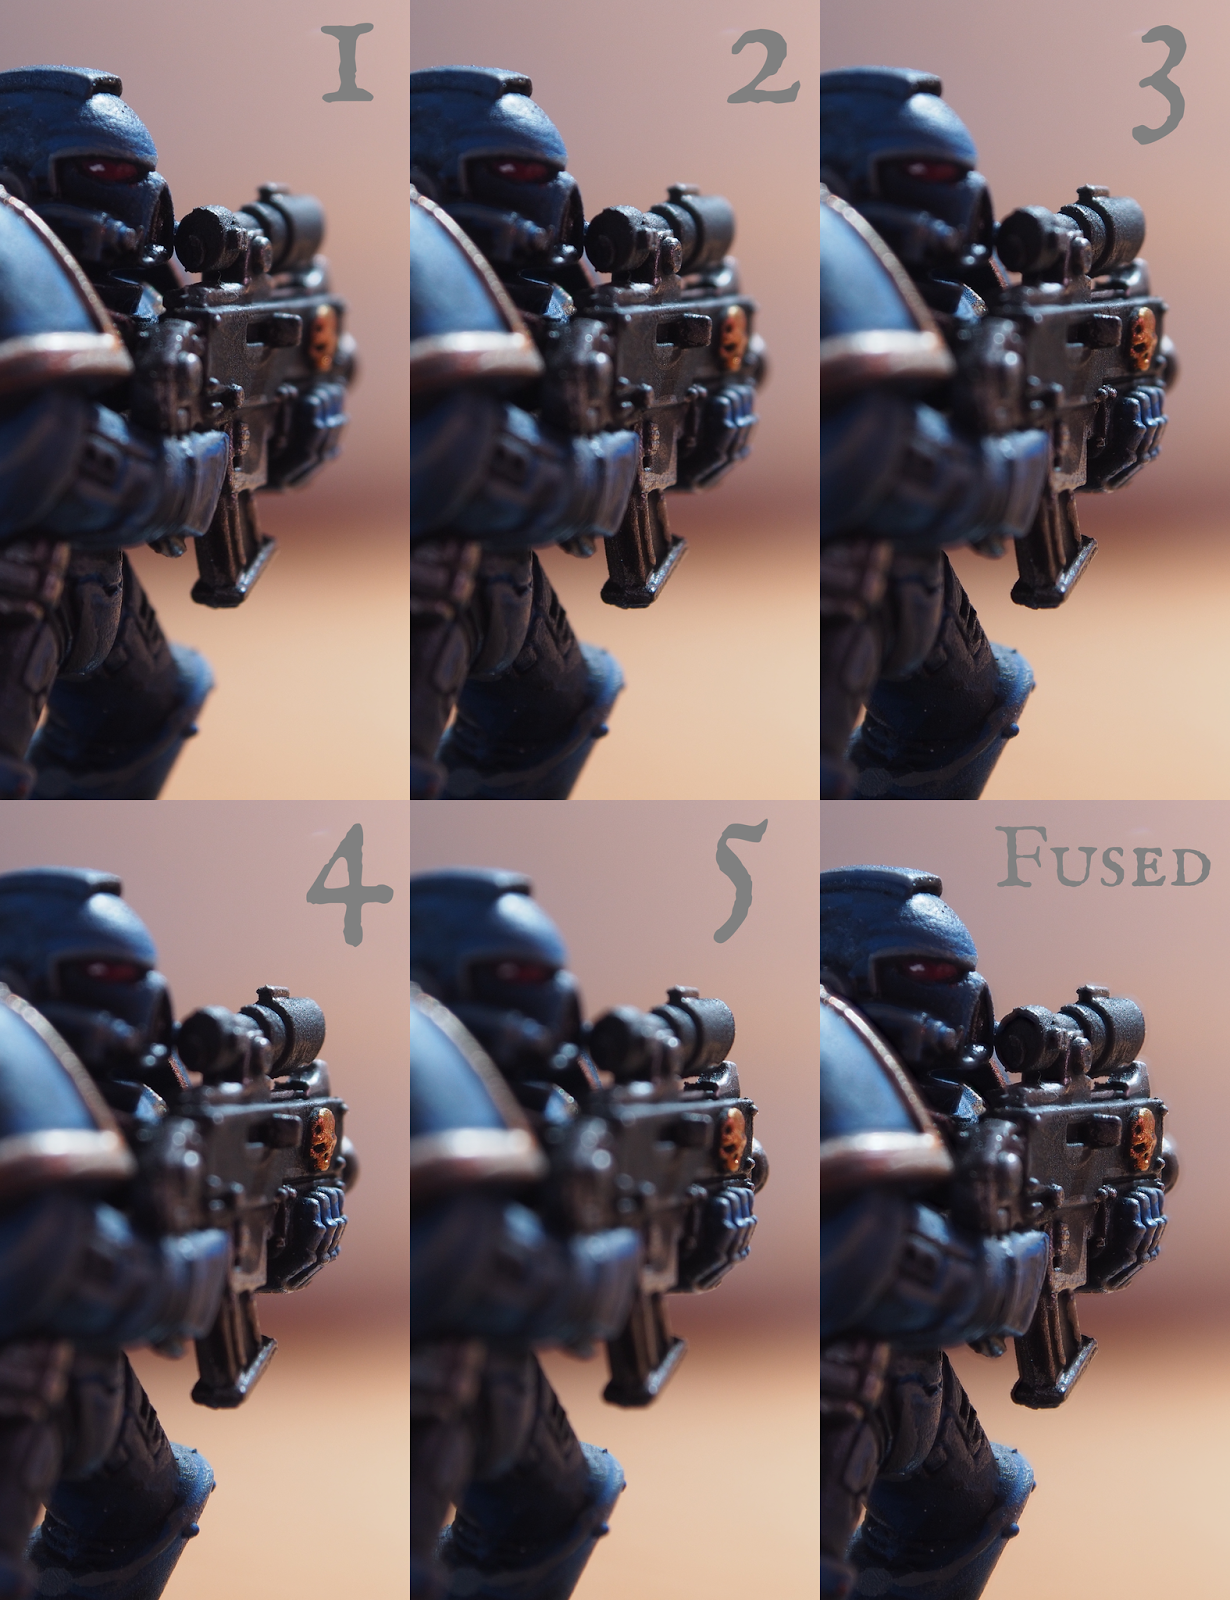
So, what if you want a deeper depth of field in your shots? Well, there’s a neat technique called “Focus Stacking” where you will take multiple images, with the only thing that varies between them is the focal point. Look again at the lead image, and specifically notice how the focus plane shifts along the length of the gun body.
Basically, compose and capture an image with the focus at one point, then focus a little further into your image, repeat as often as needed to have the range you want all in focus.
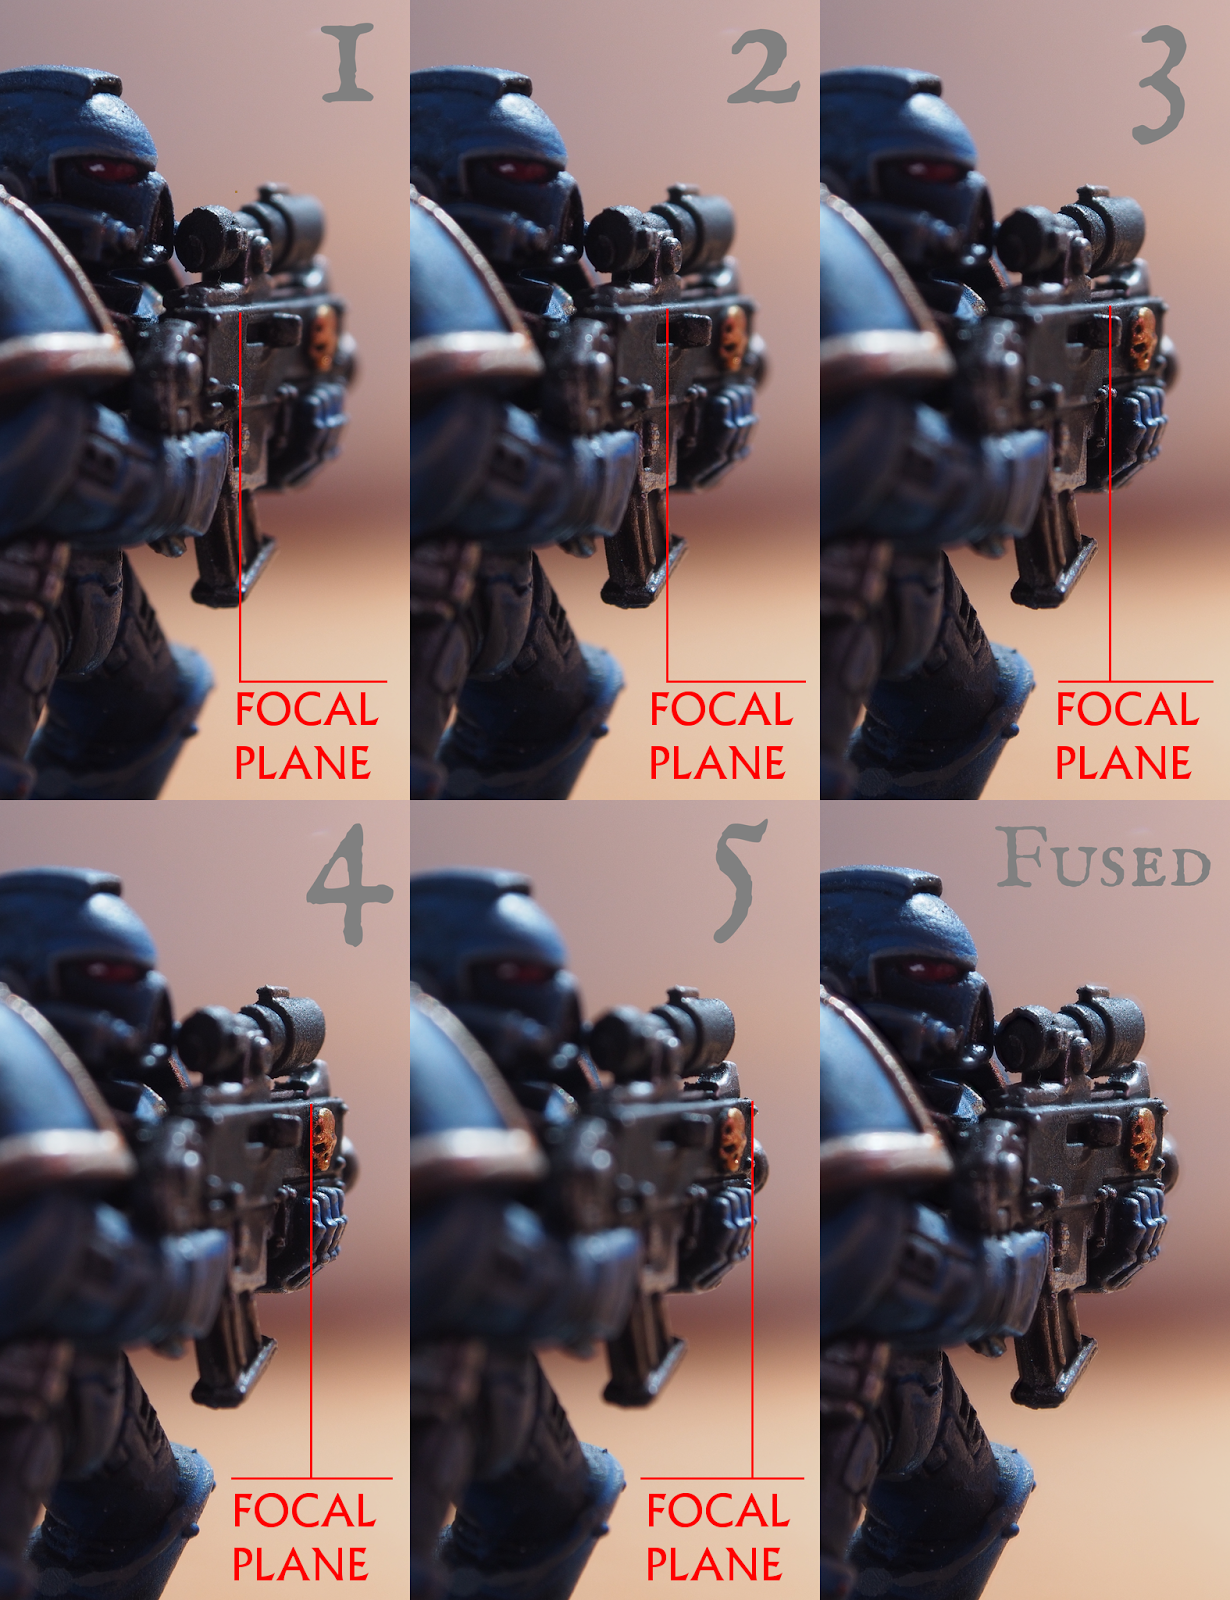
Focus stepping across my subject.
The problem, of course, is that you now have multiple images, all with different focus planes. How can you combine them all into one image where the different in-focus areas are all combined?
Well, we’re going to use the open source Enfuse to do this dirty work for us. First, though, we need to make sure the images are properly aligned first…
Hugin Align Images
Well, Enfuse will work best if the images that are going to be combined are all as perfectly aligned as possible. To do this, we’re going to use align_image_stack from Hugin.
Hugin is a really useful tool to have installed if you haven’t already. To follow along with any of this, you’ll need to install it anyway - so go do that now. Once installed, you can invoke the align_image_stack script from the bin/ directory of wherever you installed Hugin. It will look something like this (on Windows at the moment, so this is what the Windows command will look like on my machine):
C:\Program Files\Hugin\bin\align_image_stack -m -a OUT FILE1 FILE2 FILE3
Don’t Panic. To follow along, basically, put all of your focus stacked images into a single directory. Open a command prompt, and navigate to that directory.
Assuming your Hugin installed in the same place as mine, you can run the command as I show above. The -m switch will optimize the field of view for all images except the first. The -a OUT will prefix all the output files as OUT…tif, and FILE1 FILE2 etc… are the names of each of your focus stacked images you are starting with.
When it’s done, you’ll have a few new images in your directory named OUT000#.tif. These are your newly aligned output images, and will be what we work with from here on out.
Enter Enfuse
At this point you’ve got your images aligned perfectly (hopefully), and now all that is left is to mask each image so only the sharpest, in-focus portions show through. This is exactly what we are going to get Enfuse to do for us.
Enfuse can be run from the command line (the same bin/ directory where align_image_stacks was located) as part of a Hugin installation, or there is a GUI called EnfuseGUI that will expose all the options along with fast previews.
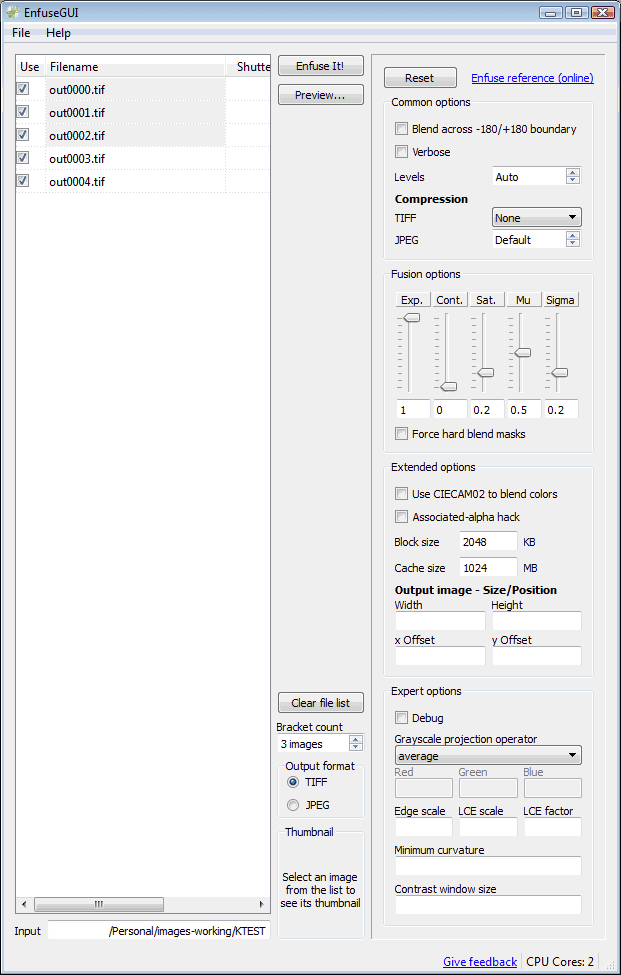
The EnfuseGUI interface.
I’ll cover both here just to be thorough.
From the manual for Enfuse, there is a section that specifically addresses focus stacking. In particular, they refer to a bare-bones call for Enfuse to stack the images:
enfuse \
    --exposure-weight=0 \
    --saturation-weight=0 \
    --contrast-weight=1 \
    --hard-mask \
    ... \
    --output=output.tif \
    input-<0000-9999>.tif
The same options entered in EnfuseGUI are located at “Fusion options”:
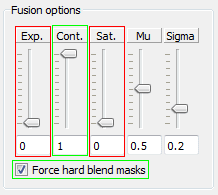
Base focus stacking parameters in EnfuseGUI.
Exposure and Saturation weighting should be set to 0, while Contrast weighting should be set to 1 and Force hard blend masks should be checked. These options will not be changed as you dial in your focus stacking parameters.
You can actually go ahead and run it at this point to see what your output will look like. It should run reasonably quick, and you can investigate the results. The nice thing about EnfuseGUI is that you can generate a fast preview of the results using the Preview button instead of a full run (this is very useful while you tweak parameters to see what type of effect they’ll have).
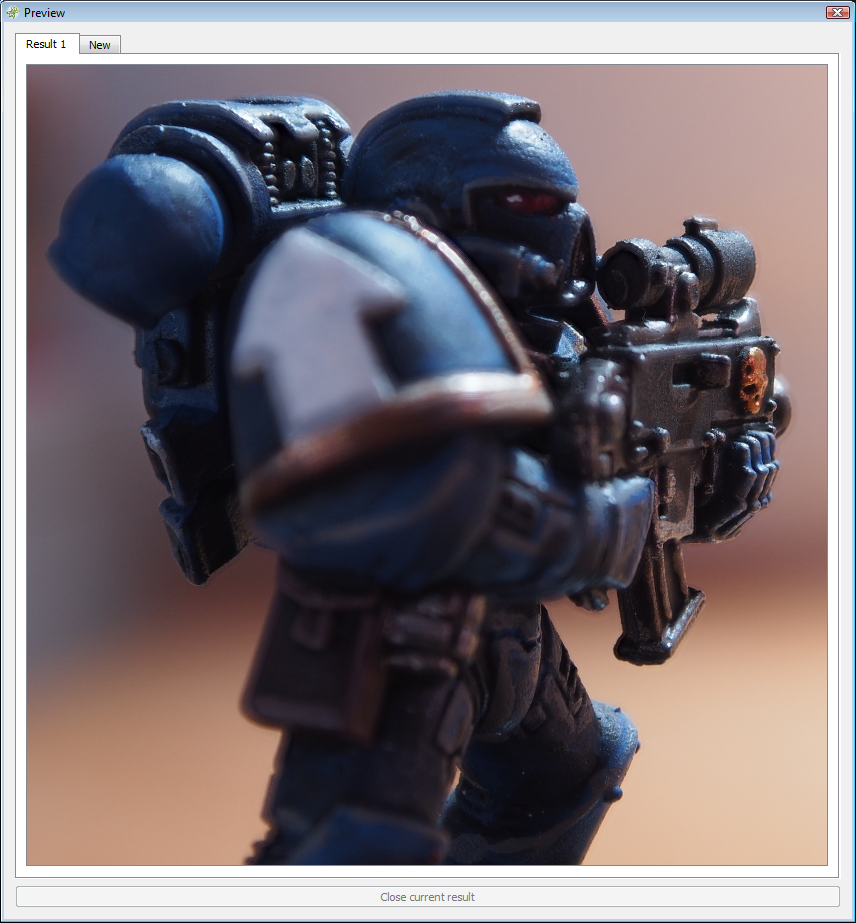
EnfuseGUI preview of base focus stacking parameters.
If you’re happy with these results, then stop here. That’s it! Quick, relatively painless, and you’re happy with the results. Go have a beer! (Seriously, many people will be fine with these results, and don’t have to head any further).
If you’re curious whats happening behind-the-scenes, you can pass the option:–save-masksto have Enfuse save each of the masks that it creates. Below, for example, are the masks that were generated for the above image. You can clearly see the in-focus plane in white in these masks:
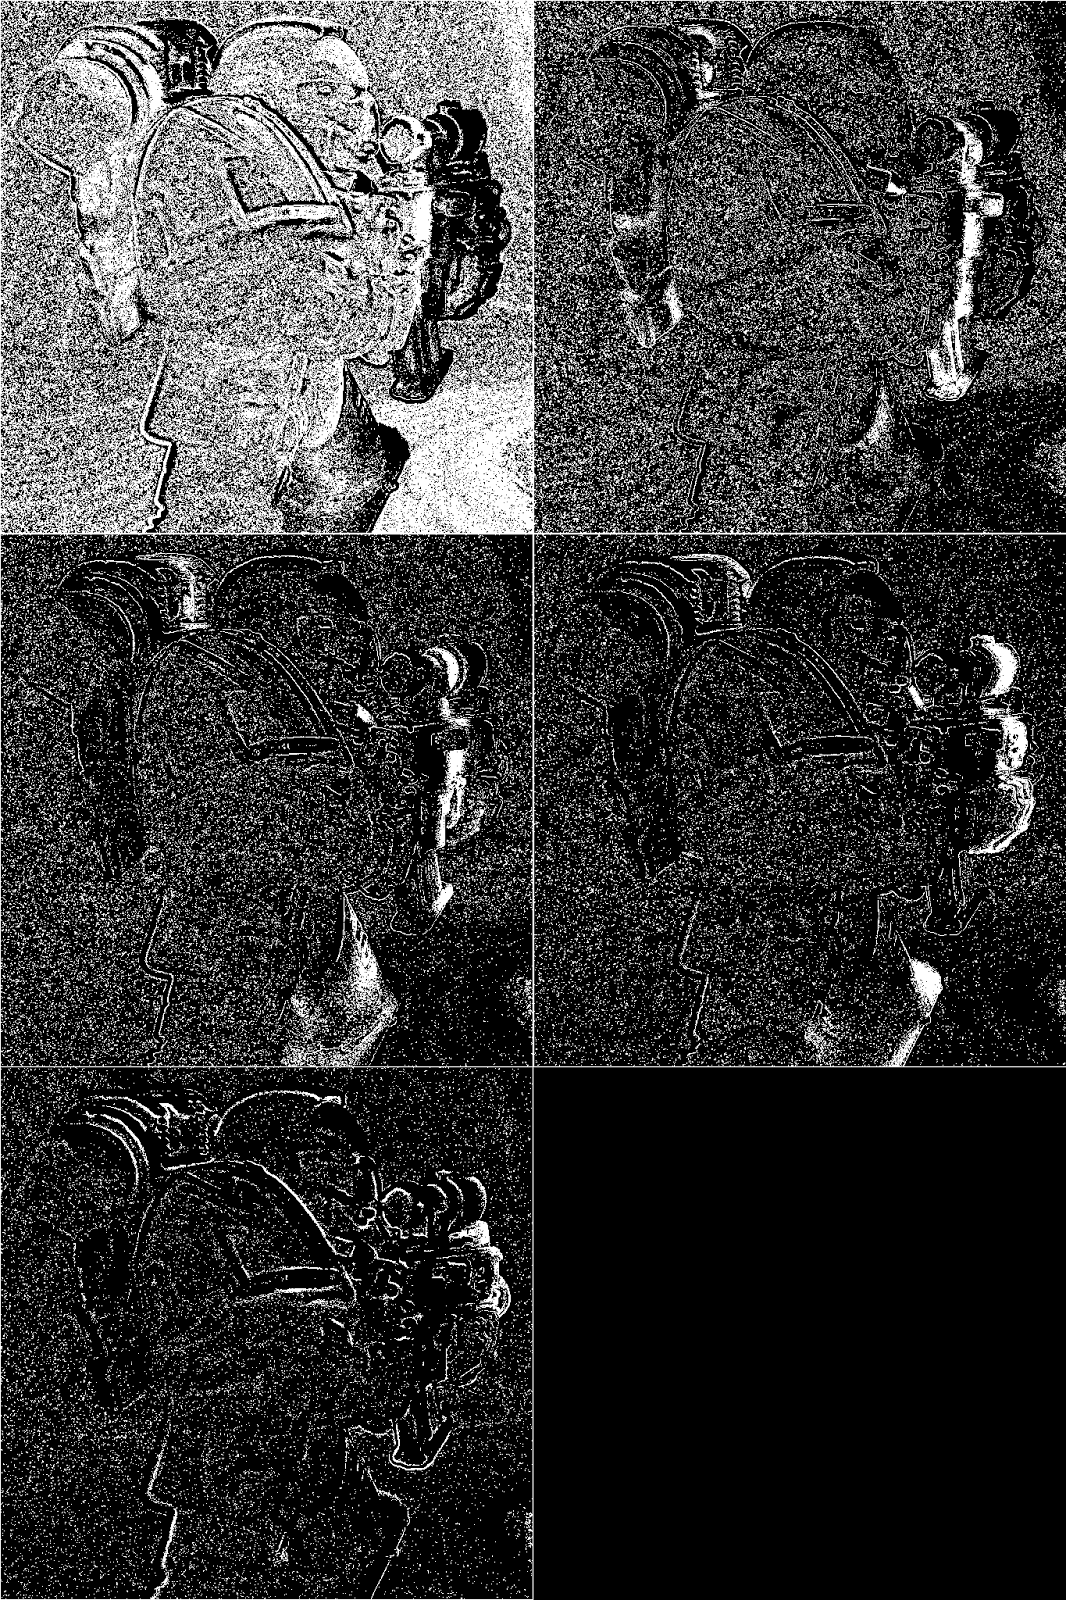
Masks generated by Enfuse (white areas in-focus).
Enfuse Expert Options
If you’re still here, I am going to assume that you are less than satisfied with the results.
If you pay careful attention to high-contrast edges in your image, you may notice some faint “ghosting” on either side. On the dark side of a high contrast edge, you may notice a faint, light seam, and vice-versa on the light side. There may also be some slight “smearing” in areas that obscure some details.
One of the options that I find to produce slightly better results are to use the L* channel of LAB colorspace as the grayscale projector to Enfuse (don’t worry about the technical stuff - basically use the L* channel in LAB to create the masks as opposed to averaging).
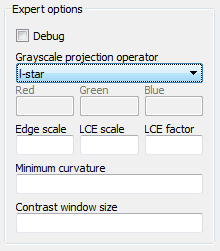
Using L* from LAB to create masks
If you notice some haloing effects around high contrast edges, you can mitigate them a bit by increasing the size of the box Enfuse uses to evaluate contrast detection. The option to adjust this box size is:
–contrast-window-size=XWhere X ≥ 3. The documentation points out that values larger than 5 might produce blurry images, but I would experiment with values all the way up to 9 to see how it effects your final output.
There is another good option to tweak your final output, and that is to enable the Laplacian Edge Detection algorithm. Laplacian Edge Detection can be enabled by passing a positive value to:
–contrast-edge-scale=XWhere X typically ranges between 0.1 - 0.5 (pixels), and 0.3 is suggested as a good starting point.
Unfortunately, due to a bug in EnfuseGUI, the GUI won’t accept values that are commonly used for the correct parameter. The GUI only accepts integer values, with no way to pass a decimal value (0.3 for instance).
No problem! We can just switch gears here at this point and fall back to the trusty command line. So at this point, besides the base parameters, I am going to add in contrast-edge-scale to enable the Laplacian Edge Detection algorithm:
enfuse \
    --exposure-weight=0 \
    --saturation-weight=0 \
    --contrast-weight=1 \
    --hard-mask \
    <span style="color:#00FF00;">--gray-projector=l-star \</span>
    <span style="color:#00FF00;">--contrast-edge-scale=0.3 \</span>
    --output=output.tif \
    input-<0000-9999>.tif
You can compare the results of adding in the l-star option and using the Laplacian edge detection at 0.3 pixels below:


In Summary
Whew! That was a lot of information. Let me summarize the steps here. Assuming you have all of your stack images in the same directory:
- Use Hugin's align_image_stack to make sure all of your images are perfectly aligned.
align_image_stack -m -a OUT FILE1 FILE2 FILE3 - Try Enfuse with the base focus stacking parameters to see if you are happy with the results.
enfuse --exposure-weight=0 --saturation-weight=0 --contrast-weight=1 --hard-mask --output=base.tif OUT*.tif - You can also try a different type of grayscale conversion, I've found the L* channel from LAB to be pretty good overall ( --gray-projector=l-star ).
enfuse --exposure-weight=0 --saturation-weight=0 --contrast-weight=1 --hard-mask --gray-projector=l-star --output=base.tif OUT*.tif - If there are halos around high contrast edges, you can try increasing the contrast-window-size a bit. ( --contrast-window-size=5 ).
enfuse --exposure-weight=0 --saturation-weight=0 --contrast-weight=1 --hard-mask --contrast-window-size=5 --output=base.tif OUT*.tif - If details are smeared, try using Laplacian Edge Detection instead. (Adding --contrast-edge-scale=0.3 to the base command), and possibly removing --contrast-window-size.
enfuse --exposure-weight=0 --saturation-weight=0 --contrast-weight=1 --hard-mask --contrast-edge-scale=0.3 --output=base.tif OUT*.tifModify the value between 0.1 and 0.5 to see which result is best for you.
Thoughts
If you want a truly sharp macro shot with a large, smooth depth of field, you’ll be taking a lot of photos. Seriously. I’ve seen 100+ images used for a single macro shot. Look at these:
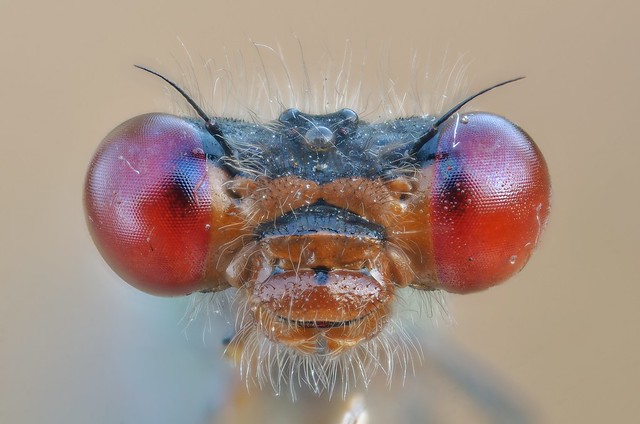
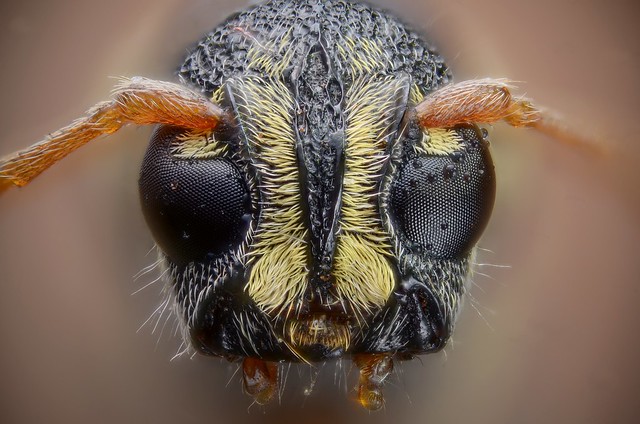
Try keeping an overlap between each of your shots. It’ll avoid any seams in the final result. Remember, Garbage in - Garbage out.
The documentation offers a good tip as well - if the in-focus to out-of-focus transition is too sharp, try taking another image at the transition area with a larger aperture to allow a smoother, more natural falloff to occur.
Thats it! Hopefully this will be helpful to somebody, somewhere! If you found this walkthrough helpful in any way, please feel free to share it with others
Some References
- The Enfuse documentation (section on Focus Stacking)
- How to obtain a greater depth of field in macro photography - EDU PÉREZ (Internet Archive)
- EnfuseGUI