
DIY Ringflash
The world probably needs another DIY ringflash tutorial like they need a hole in the head. There’s already quite a few different tutorials around explaining how to create one…
So here’s mine! :)

The Ringflash and I, by Rolf Steinort
At LGM this year I hacked together a quick ringflash using parts I picked up in a €1 store while walking through the city with Rolf (he helped me pick out and find parts - Thank You Rolf!). I built one while I was there because it was way less hassle than trying to bring mine from home all the way to Leipzig, Germany (they don’t really collapse into any sort of smaller size, so they’re cumbersome to transport).
Anyway, I got some pretty strange looks from folks as I was hacking away at the plastic colander I was using. The trick to making and using these DIY ringflashes is to not care what others think …
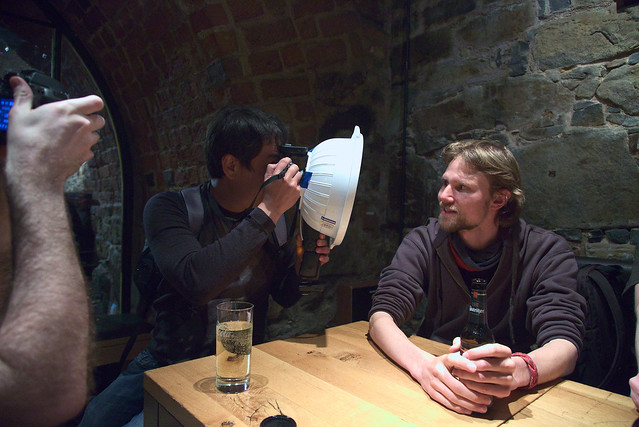
Using the ringflash on Johannes…, by Tobias Ellinghaus
Because you will look strange building it, and even stranger using it. If you can get past that, the results are pretty neat, I think.

The results of using the ringflash on Johannes…
There’s a nice even light that helps to fill in and remove harsh shadows across a subjects face (very flattering for reducing the appearance of wrinkles for instance). At lower power with other lighting it makes a fantastic fill light as well.
So, after seeing the results I had a few people ask me if I was going to write up a quick guide on building one of these things. I wasn’t intending to originally, but figured it might make for a fun post, so here we are.
Now, normally I would take fancy photos of the ringflash to illustrate how to go about making one, but I realized that it would be hard to account for all the different types, sizes, and styles that one could be made in.
Oh, and more importantly I wasn’t about to try and lug it all the way back to the states. So I left it there (I think Simon from darktable ended up taking it).
So I’ll improvise…
Building a DIY Ringflash
The Parts
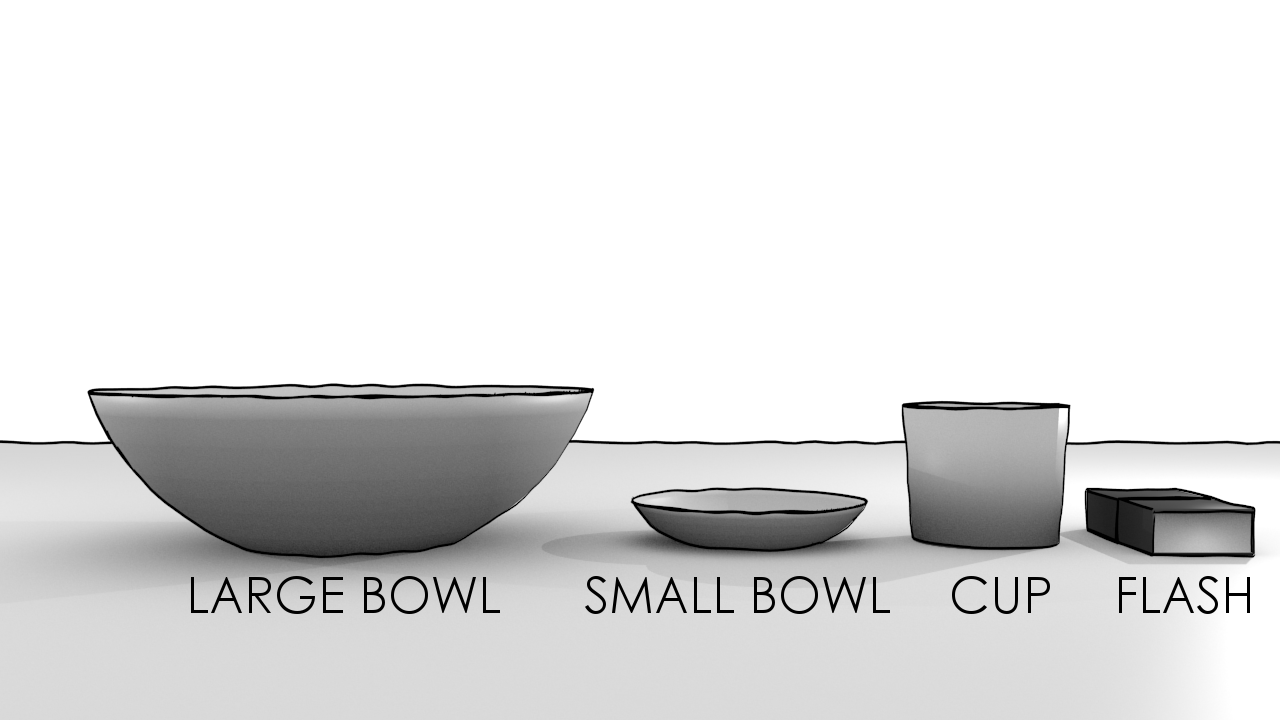
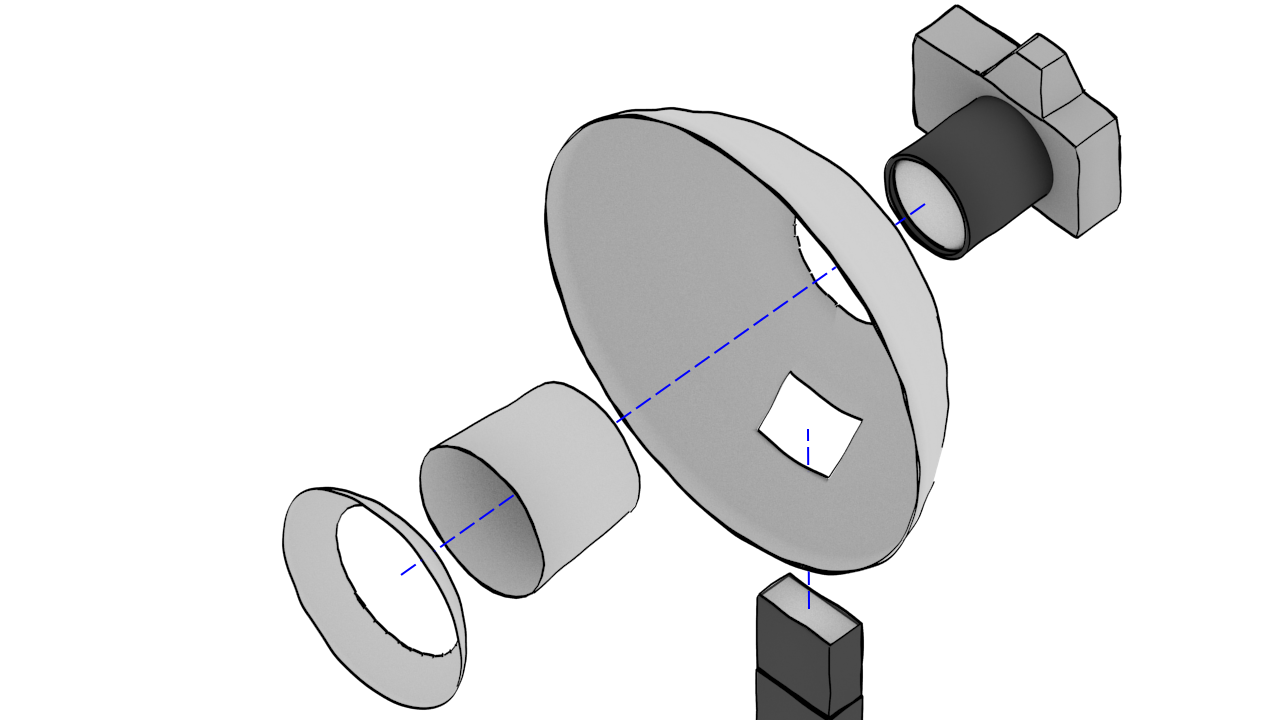
The actual parts list is pretty simple. A large bowl, a small bowl, a cup (or tube), and some tape:
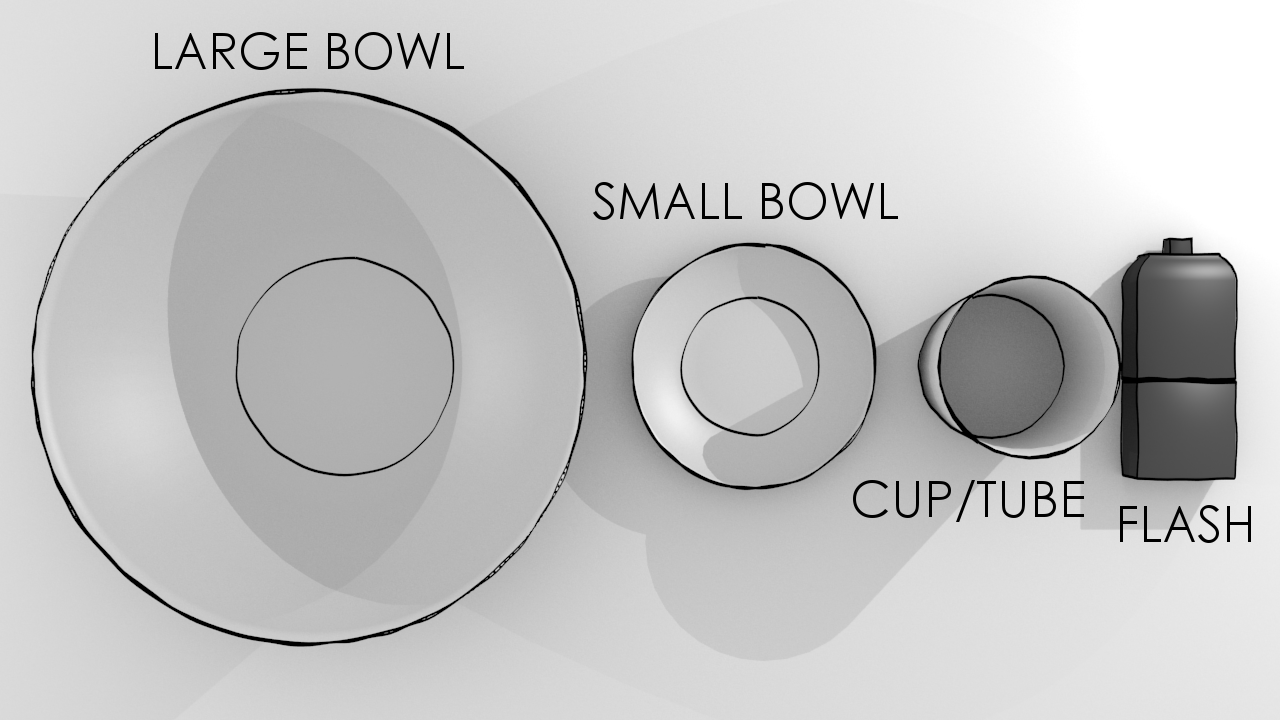
The material can be anything you can easily cut and modify, and hopefully that won’t throw it’s own color cast. White is best on the inside of the large bowl and outside of the small bowl and cup. Silver or metal is fine too, but the color temperature will trend to cooler.
The thing I mainly look for are sizes to fit my intended lens(es) I will be using:
Each of the components needs to have a diameter bigger than my lens to fit through.
I’ll also look for a bowl that has a flat bottom as it usually makes it easier for me to cut holes through it (as well as tape things together).
All the other dimensions and sizes are arbitrary, and are usually dictated by the materials I can find. In Leipzig I used a colander for the large bowl, a cup, and the same small cheap white plastic bowls they served soup in at the party for the smaller bowl*.
* I did not actually use a soup bowl from the party, I just happened to purchase the same type bowl.
The Cuts
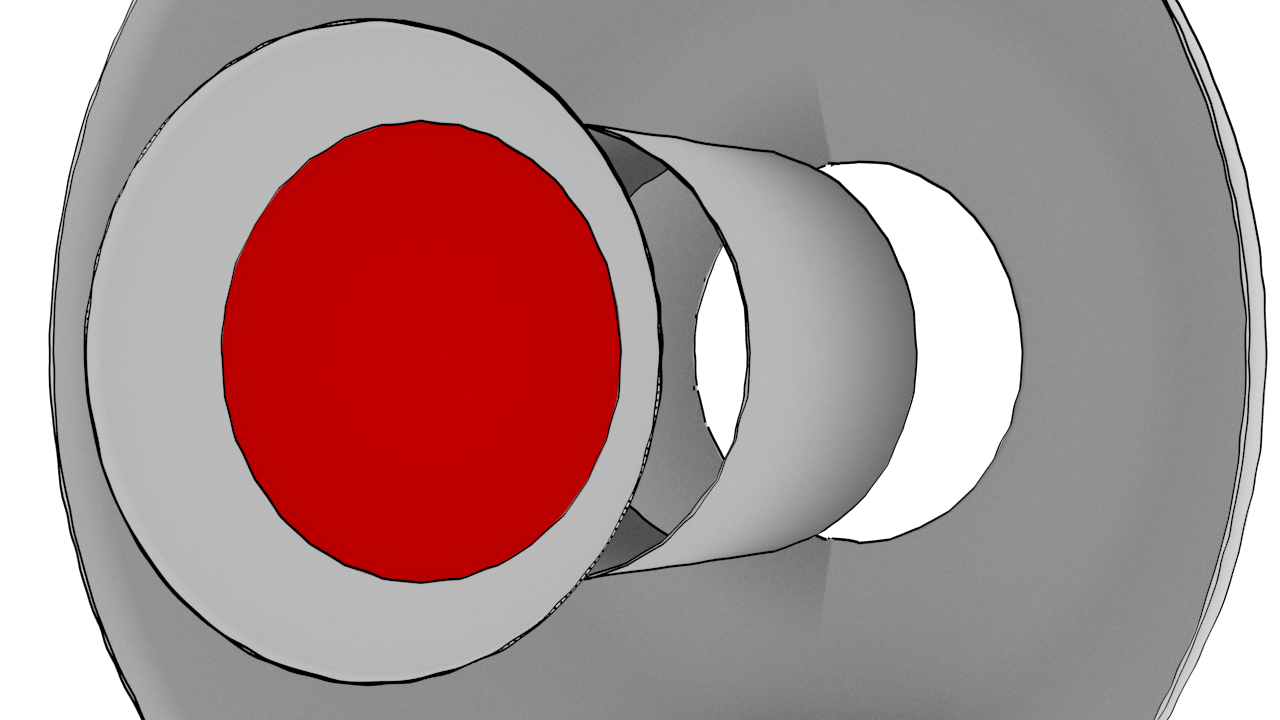
The first cut I’ll usually make is to open a hole in the side of the large bowl to allow the flash to poke through. I almost always just sort of wing it, and cut it by hand (or rotary tool if you have one):
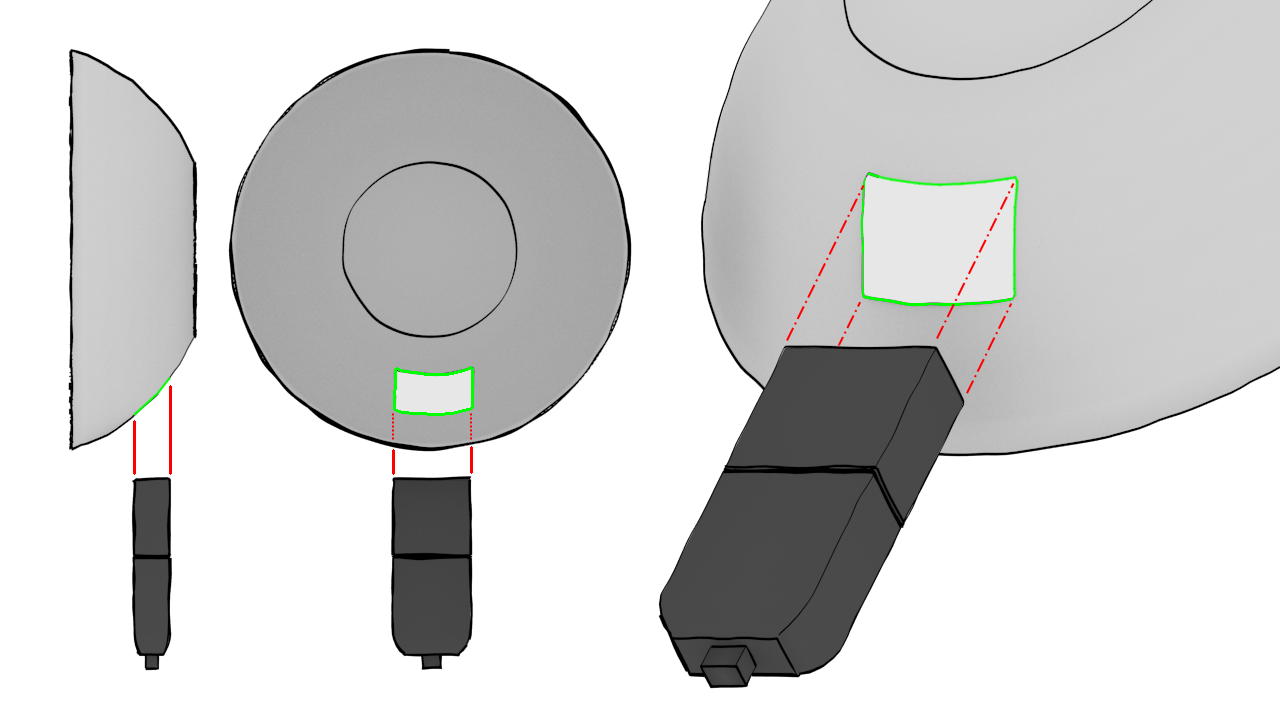
It doesn’t have to be placed perfectly in any particular location, though I usually try to place it as close to the bottom of the large bowl as possible.
Once the hole is cut, the flash should fit into place. I try to err on the side of caution and cut on the smaller side just in case. I can always remove more material if I need to, putting it back is harder.
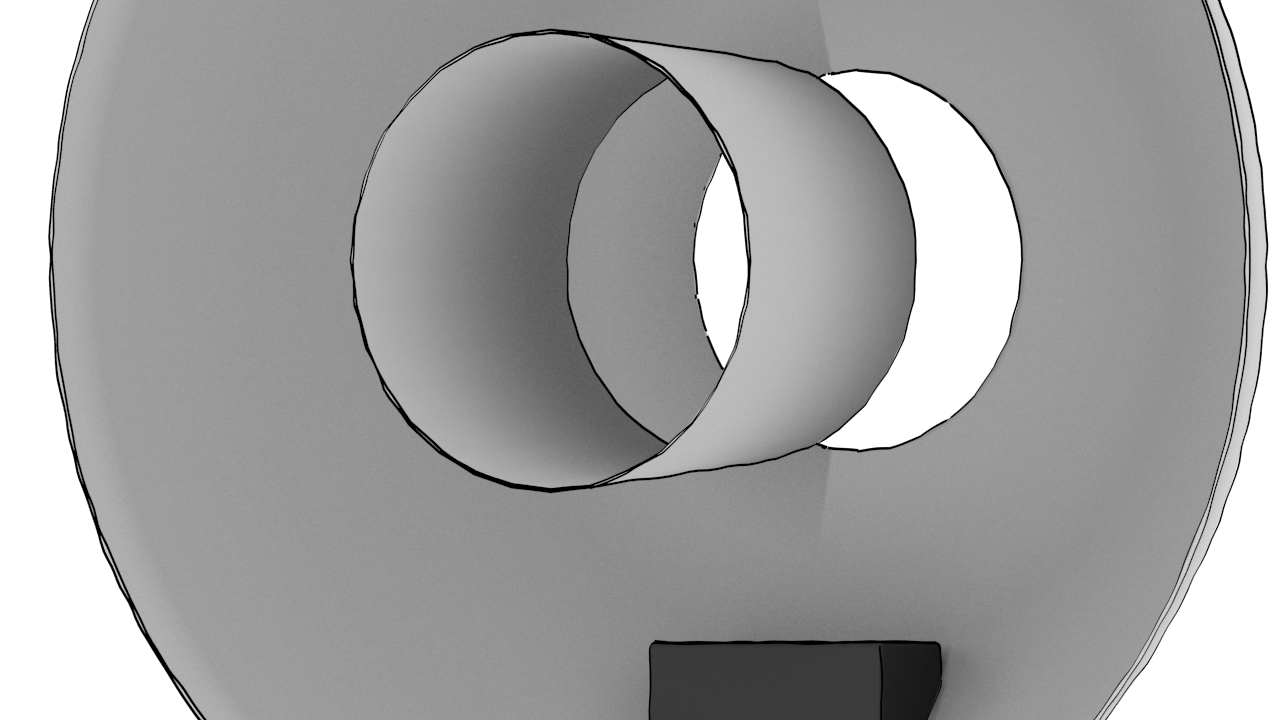
Then I’ll usually place the cup into the bowl and trace out it’s diameter onto the large bowl. When I’m cutting this hole, I try to make it on the smaller side of my mark lines to leave me some room to tape the cup into place.
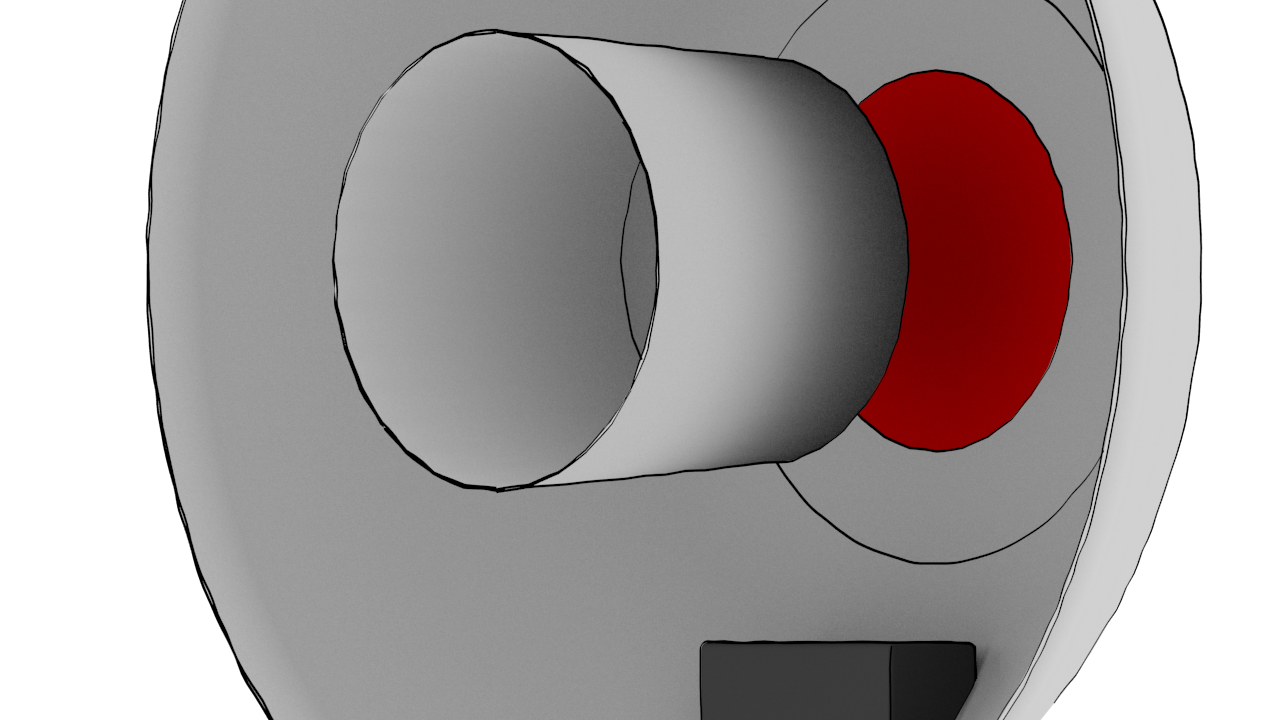
I’ll go ahead and cut the bottom of the cup now as well:
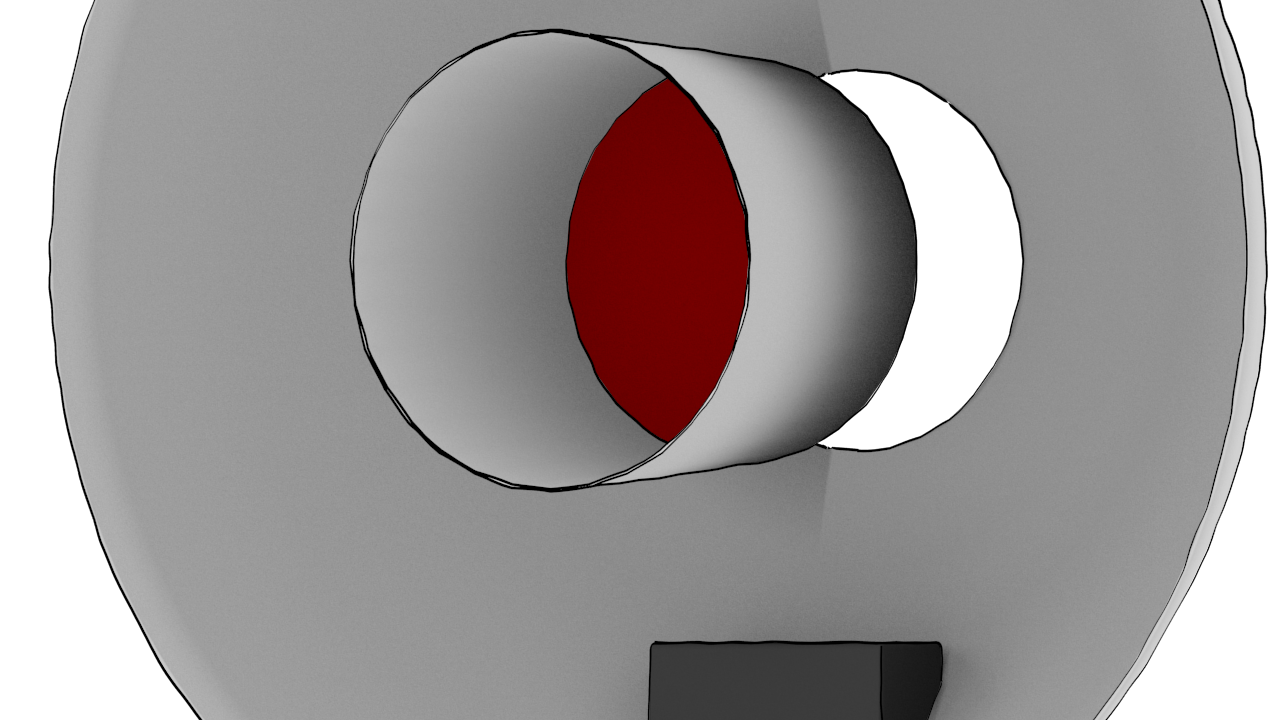
As with the large bowl, I’ll also trace the cup diameter on the small bowl and mark it. I’ll cut this hole a little small as well just in case.
That’s all there is to cut the parts! Now go grab a roll of tape to tape the whole thing together. If you want to get fancy I suppose you could use some glue or epoxy, but we’re making a DIY ringflash from a bunch of cheap bowls - why get fancy now?
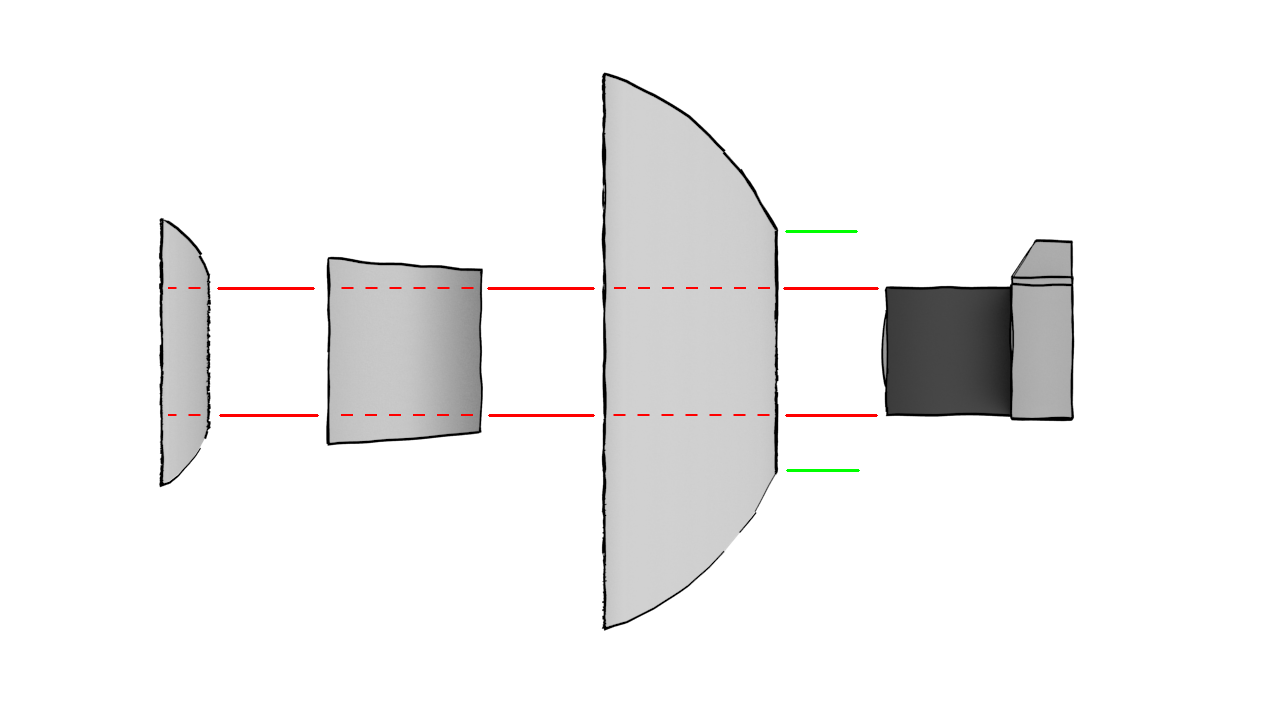
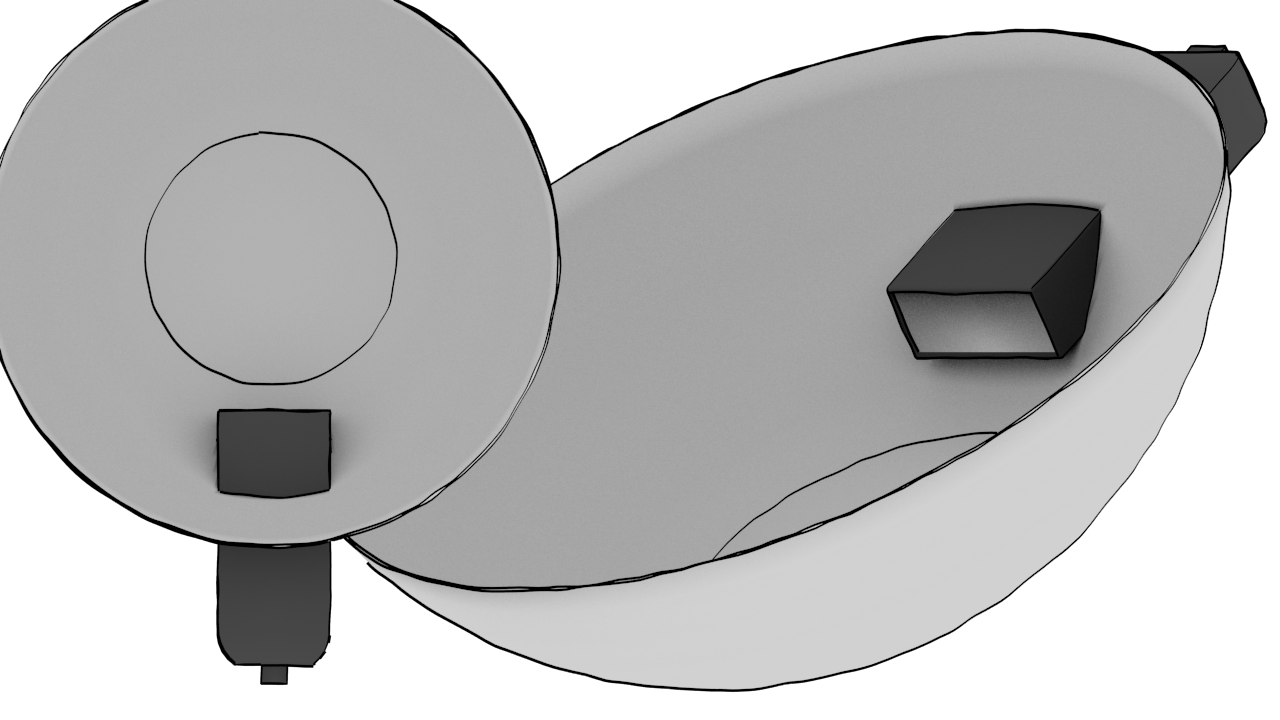
Assembly
It should be self apparent how the whole thing goes together.
One thing I do try to watch for is to not tape things together where the light will be falling. So to tape the cup to the large bowl, I’ll apply the tape from the outside back of the bowl, into the cup.
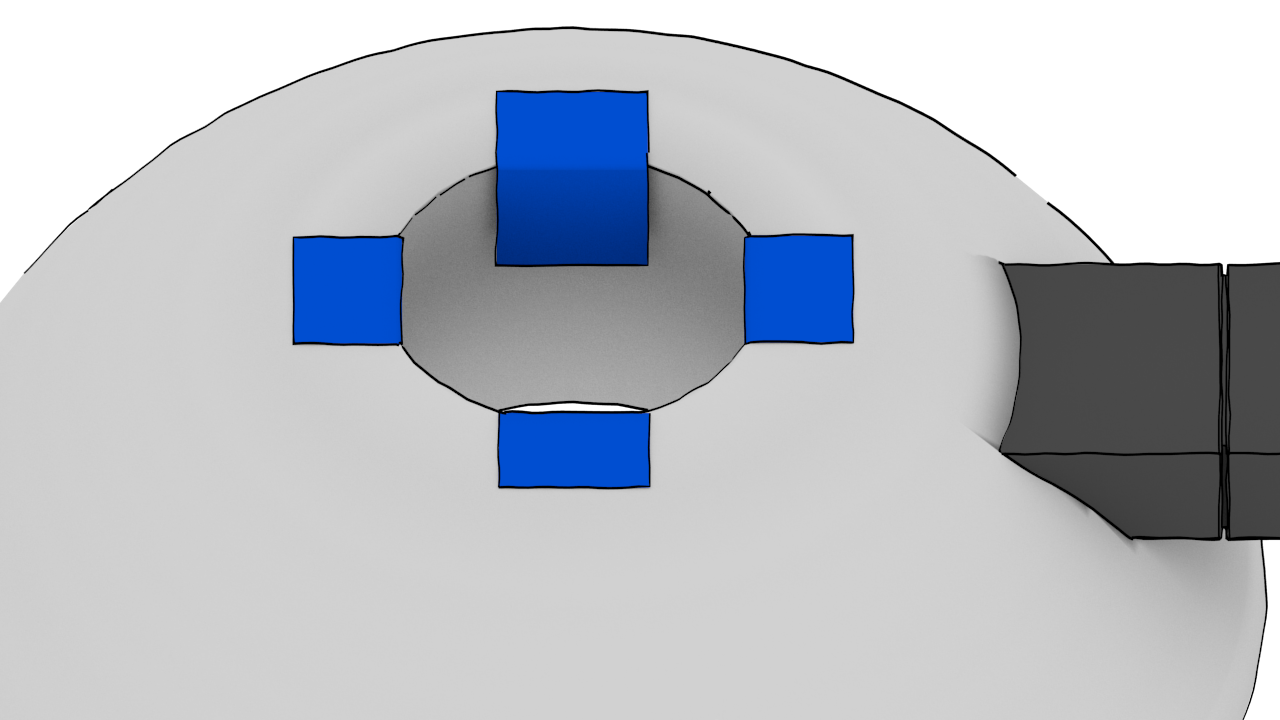
Tape the front (small) bowl into place in the same way. It might not be pretty, but it should work!
Result
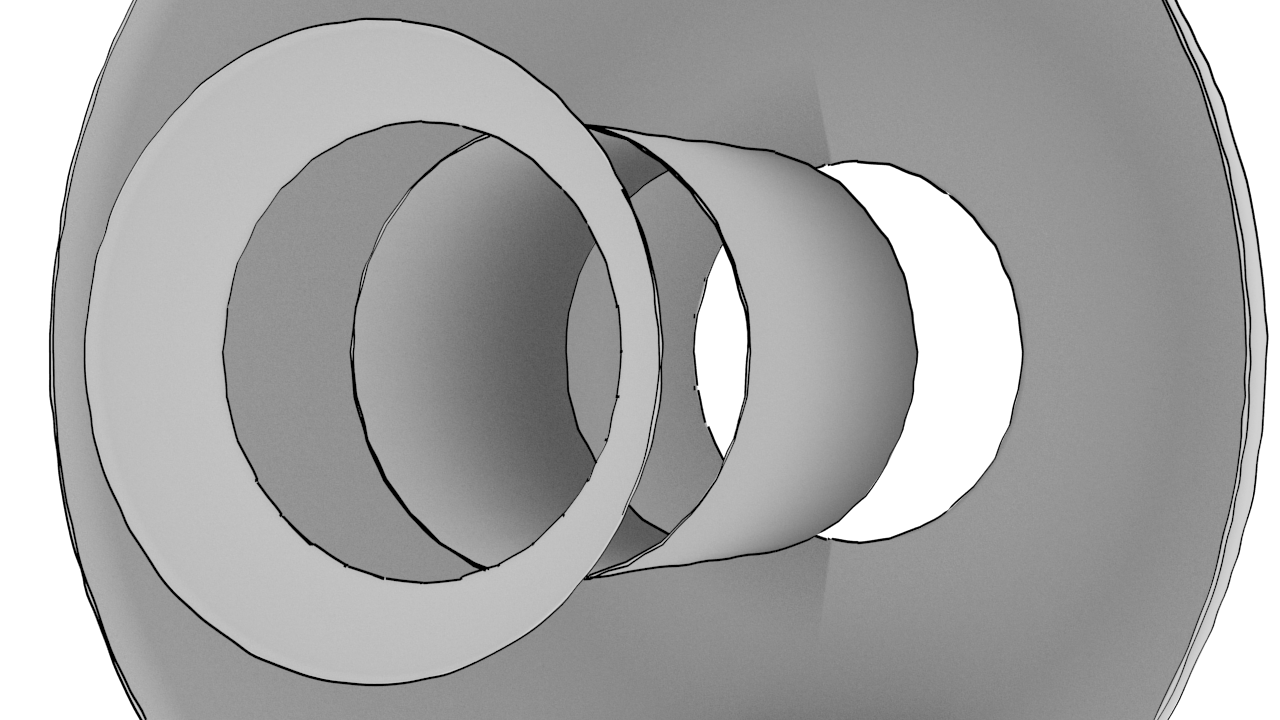
When all is said and done, this should be sort of what you’re looking at:
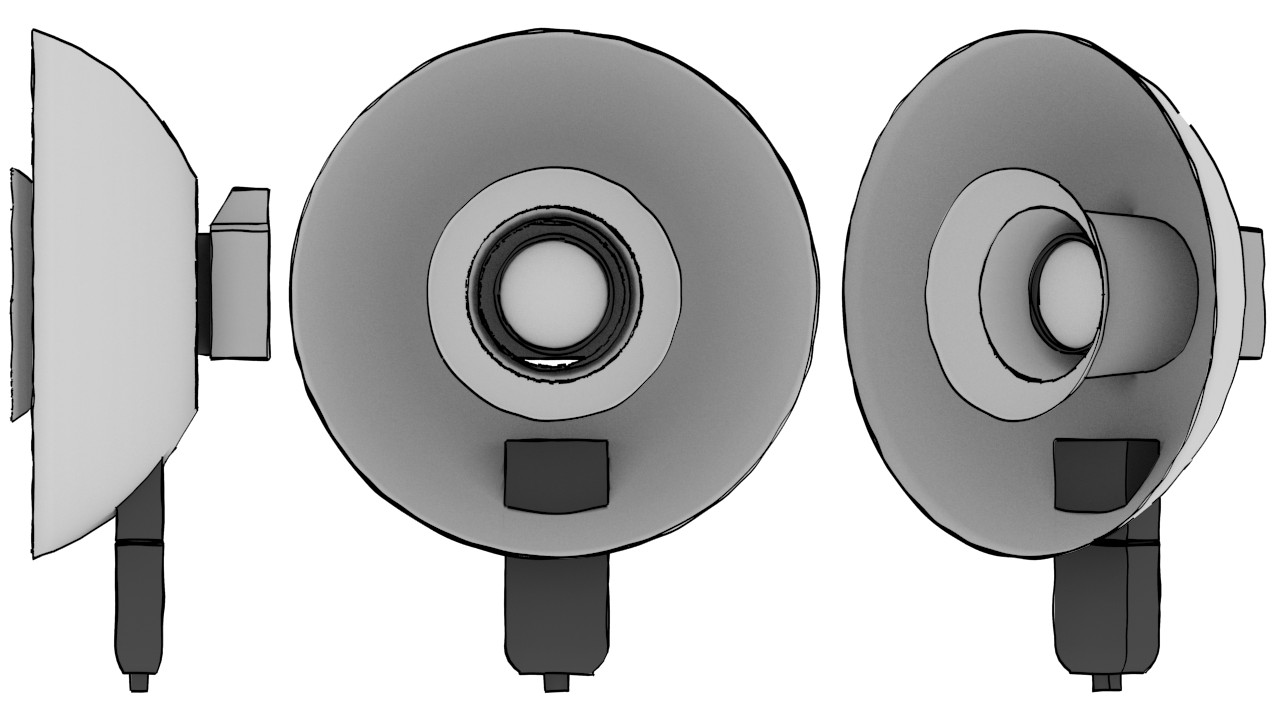
I’ve made a few of these now, and they honestly don’t take long at all to throw together. If I’m in a store for any reason I’ll at least check out cheap bowls for sale just in case there might be something good to play with (especially if it’s cheap).
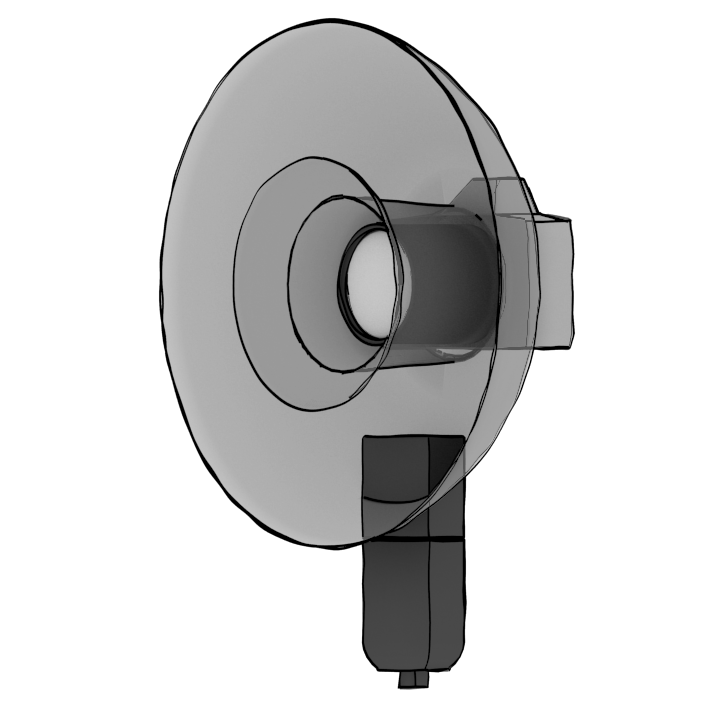
She may not look like much, but she’s got it where it counts, kid. I’ve made a lot of special modifications myself.

Using It
If you’ve got the power in your flash, it’s pretty easy to drop the ambient to near black (these were mostly all shot around f/5 1⁄250s ISO 200):


All the shots I took at the LGM 2014 party in Leipzig used this contraption (either as a straight ringflash, or a quick hand-held beauty dish). The whole set is here on Flickr.
Of course, if you put your subject up against a wall, you’ll get that distinctive halo-shadow that a ringflash throws:

Whitney

Sirko
I also normally don’t do anything to attach the flash to the bowls, or the entire contraption to my camera. The reason is that it actually makes a half decent beauty dish in a pinch if needed. All you have to do is move the ringflash off to a side (left side for me, as I shoot right-handed):

David Tschumperlé


Conclusion
Well, that’s it. I hope the instructions were clear, and at least somebody out there tries building and playing with one of these (share the results if you do!).
As you can see, there’s not much to it. The hardest part is honestly finding bowls and cups of appropriate size…