
G'MIC Montage
So I was talking with G’MIC creator David Tschumperlé the other day and thought it might be handy to have a way to create a montage of images (similar to the montage command in Imagemagick), but to have more control over the montage layout with automatic image fitting.

In the past, if I wanted to montage a series of images of different sizes, I would do it manually in GIMP. What I was proposing to David was to programatically deal with fitting images given some manual input from the user.
I know that he usually works quite fast, but he blew me away with how quick he got into the idea this time. From describing it one afternoon, it was about a day to get something working. (Add another half a day after I gave him a hard time about making the edges fit regardless of padding… Sorry David!)
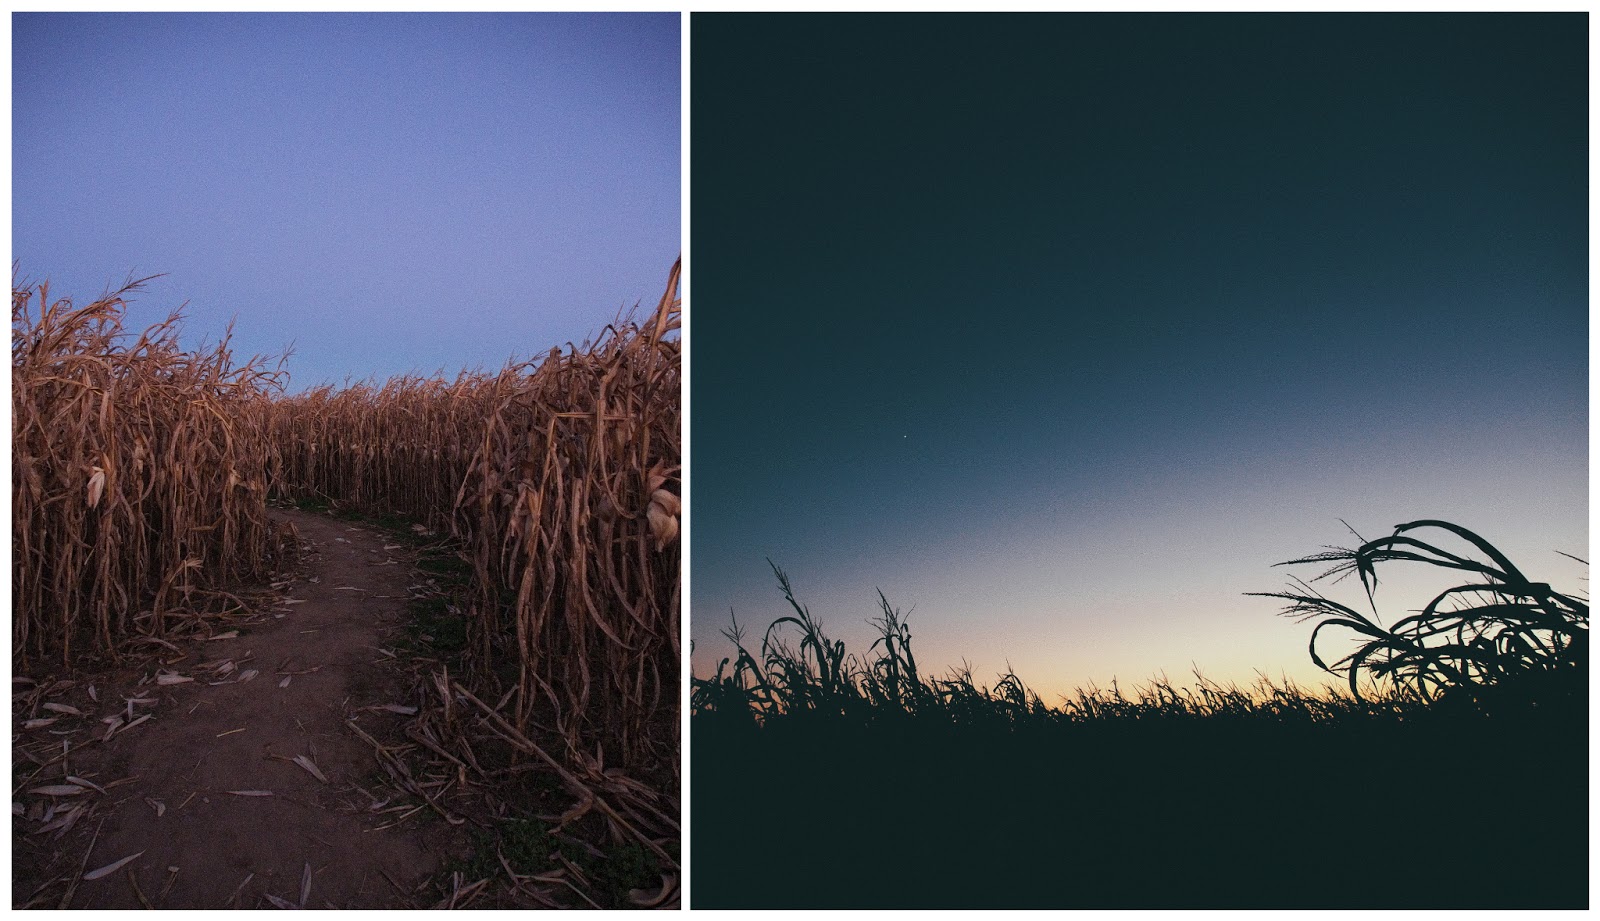
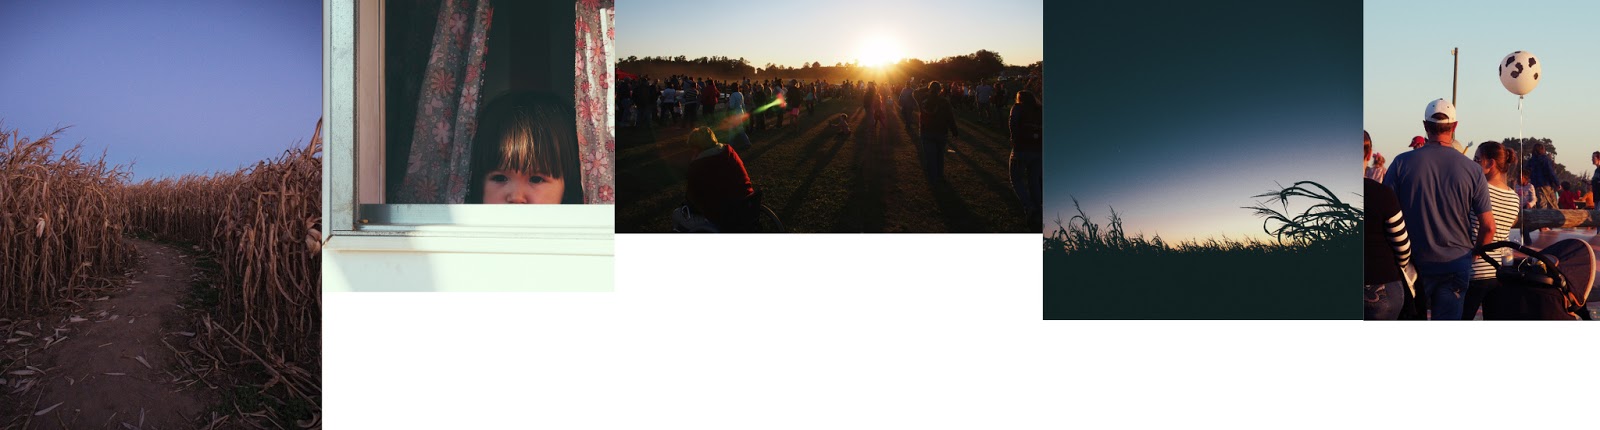
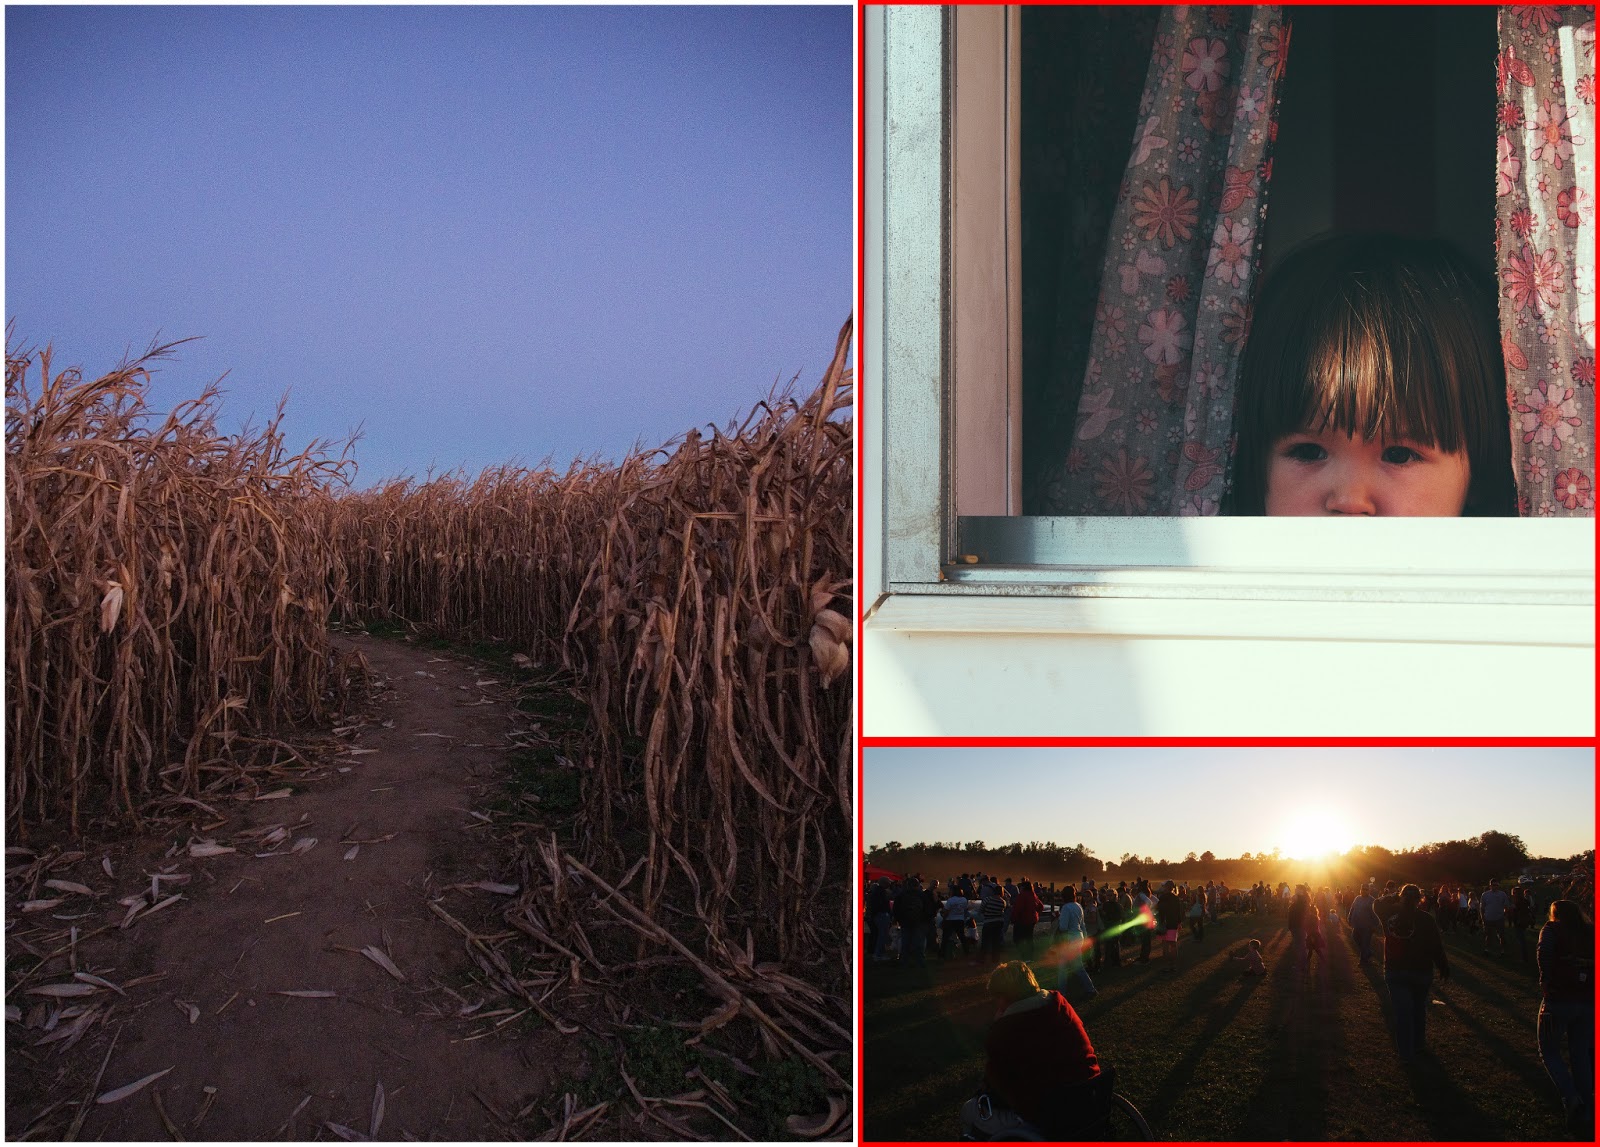
That means that it’s now trivially easy to combine multiple images and automatically have them scaled to fit each other, like this:
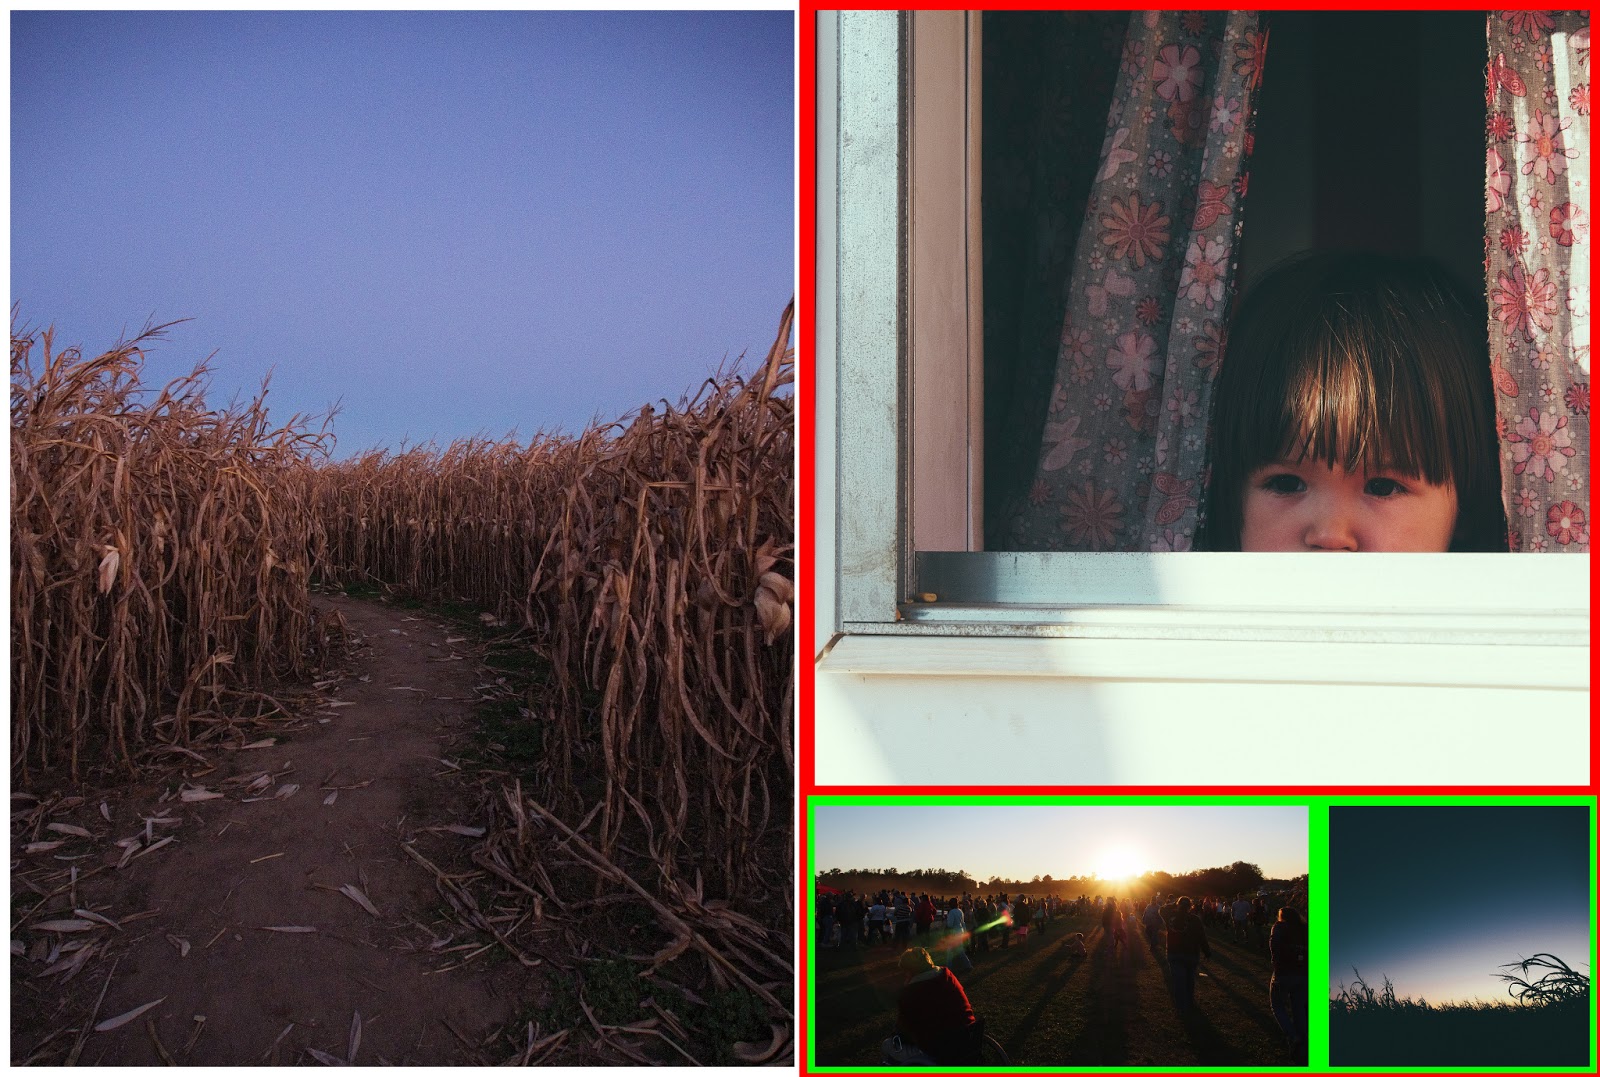
Just a single parameter change and we can re-orient the images vertically like so:
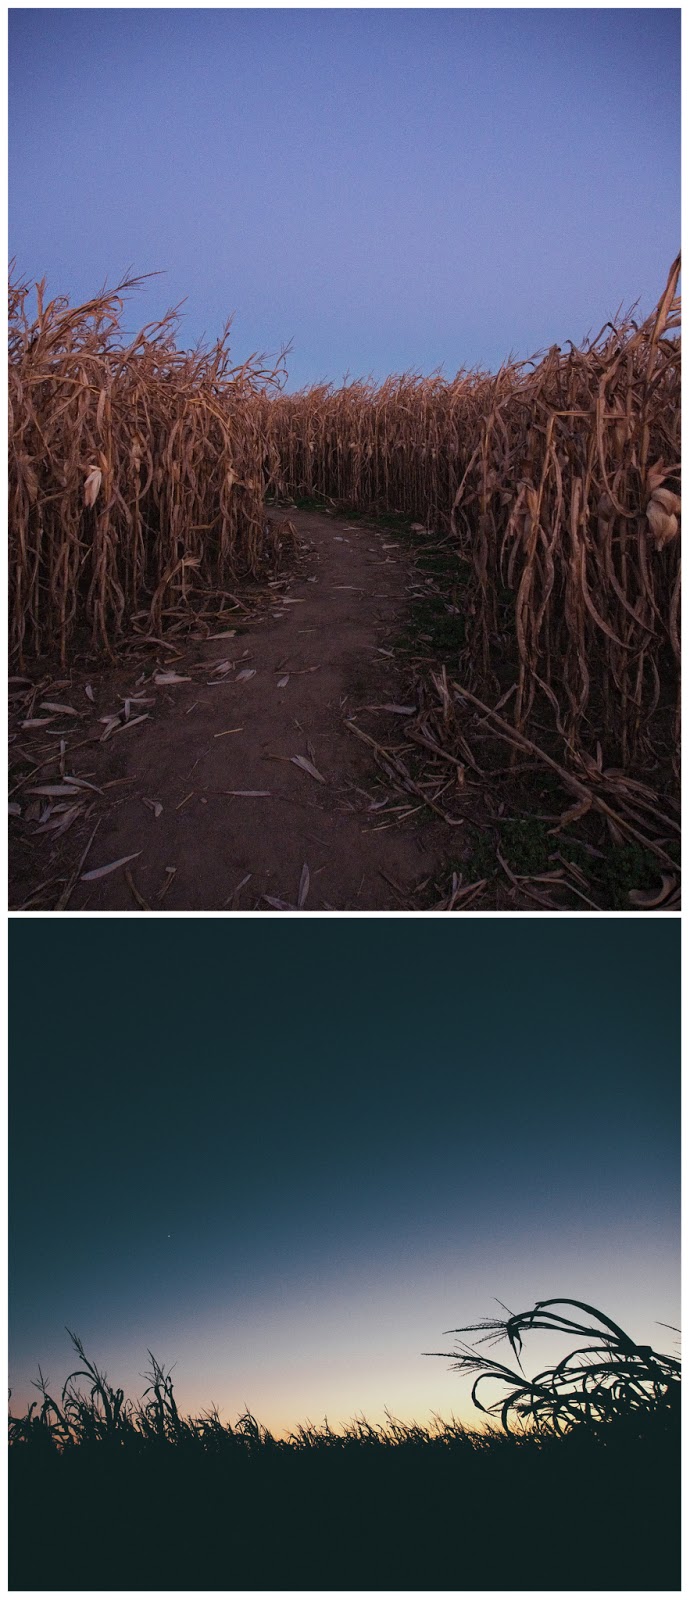
I used only two images here as a simple example, but it’s not any harder to do this with as many images as your memory will permit…

So let’s have a look at this new filter…
The Montage Filter
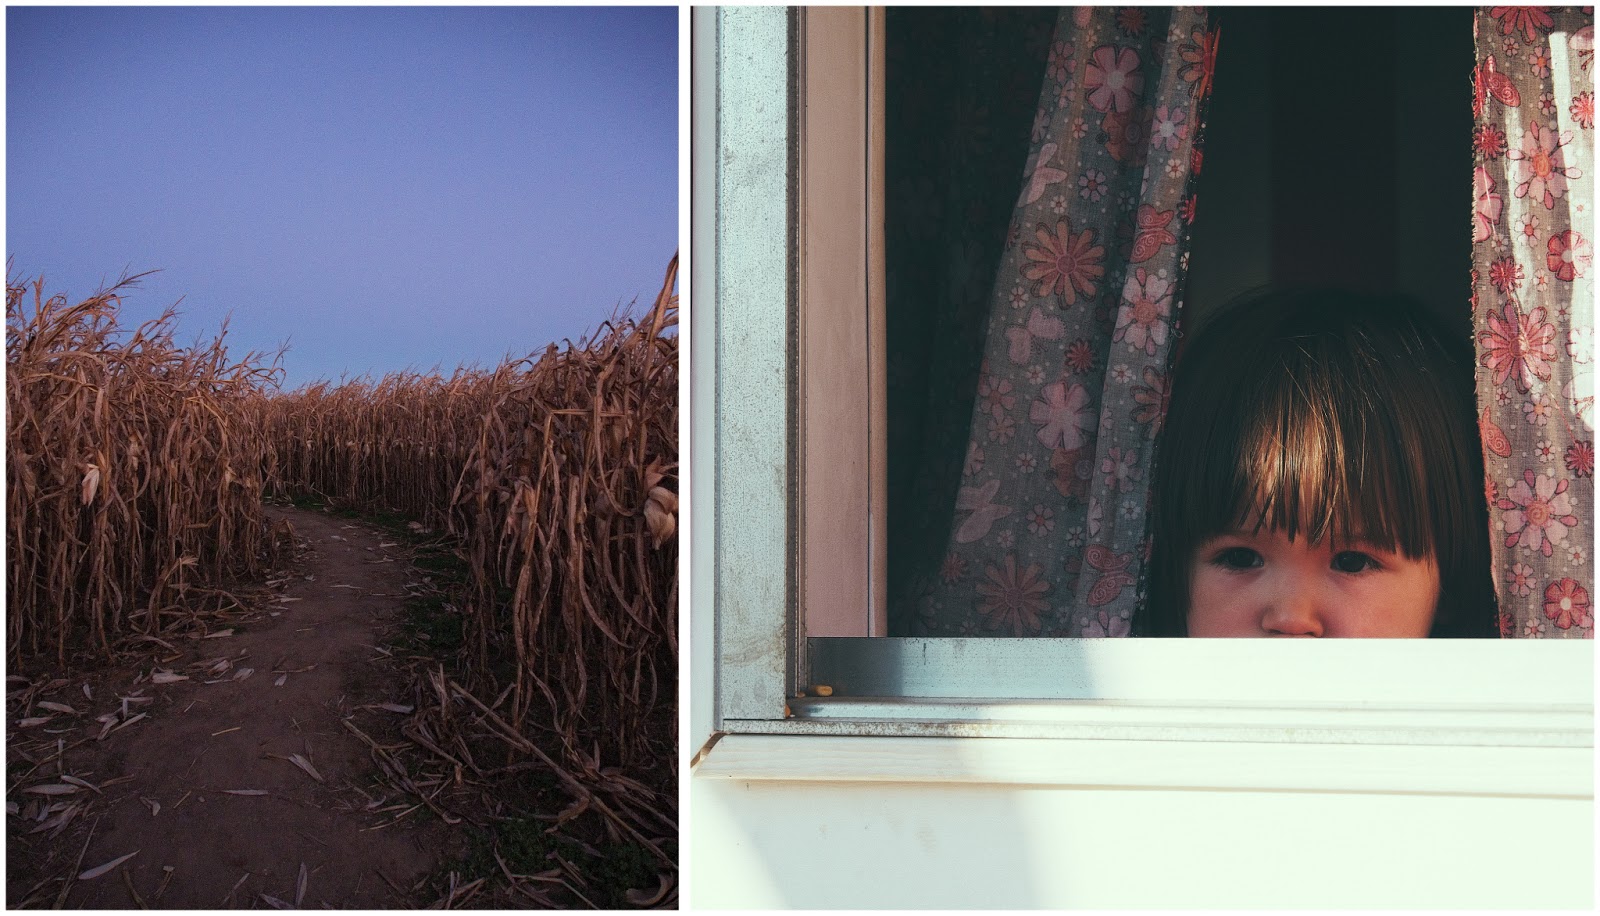
To use the filter, you’ll want to load up all of the images you want to create the montage from as layers in GIMP.
After running G’MIC,
Filters → G’MIC…
You’ll need to navigate to the new “Montage” filter:
Arrays & tiles → Montage
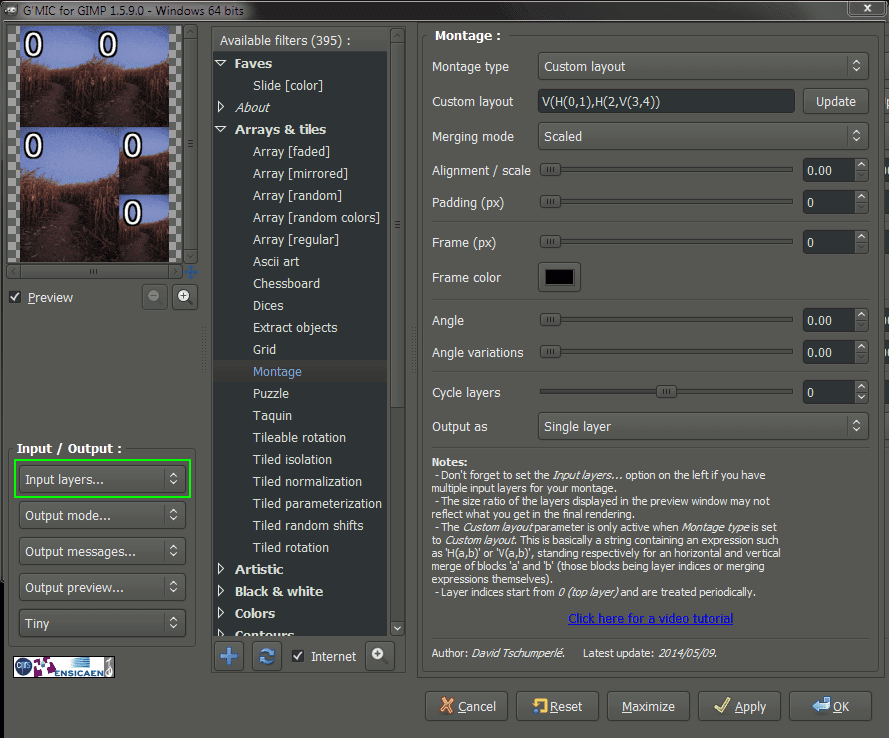
Firing up G’MIC to use the Montage filter
The first thing you’ll want to remember to do is to change the “Input layers…” to something more appropriate (I like to use “All visibles”). Your preview window should now change to show all your images. Handily, G’MIC numbers each of your images for you (this will come in handy later when you’re creating a custom montage layout.
(While you’re here, I also like to change the “Output mode…” to be “New image”. This way I can go back and easily tweak things as I fiddle.)
Montage type
The first setting you’ll want to take a look at is the Montage type. The options are:
- Custom layout You have complete control over the layout. I'll cover this in greater detail later.
- Horizontal All of the images will be arranged horizontally, height adjusted to all be the same.
- Vertical All of the images will be arranged vertically, width adjusted to all be the same.
- Horizontal Array G'MIC will create a horizontal arrangement of multiple rows, fitting the images.
- Vertical Array G'MIC will create a vertical arrangement of multiple columns, fitting all the images.
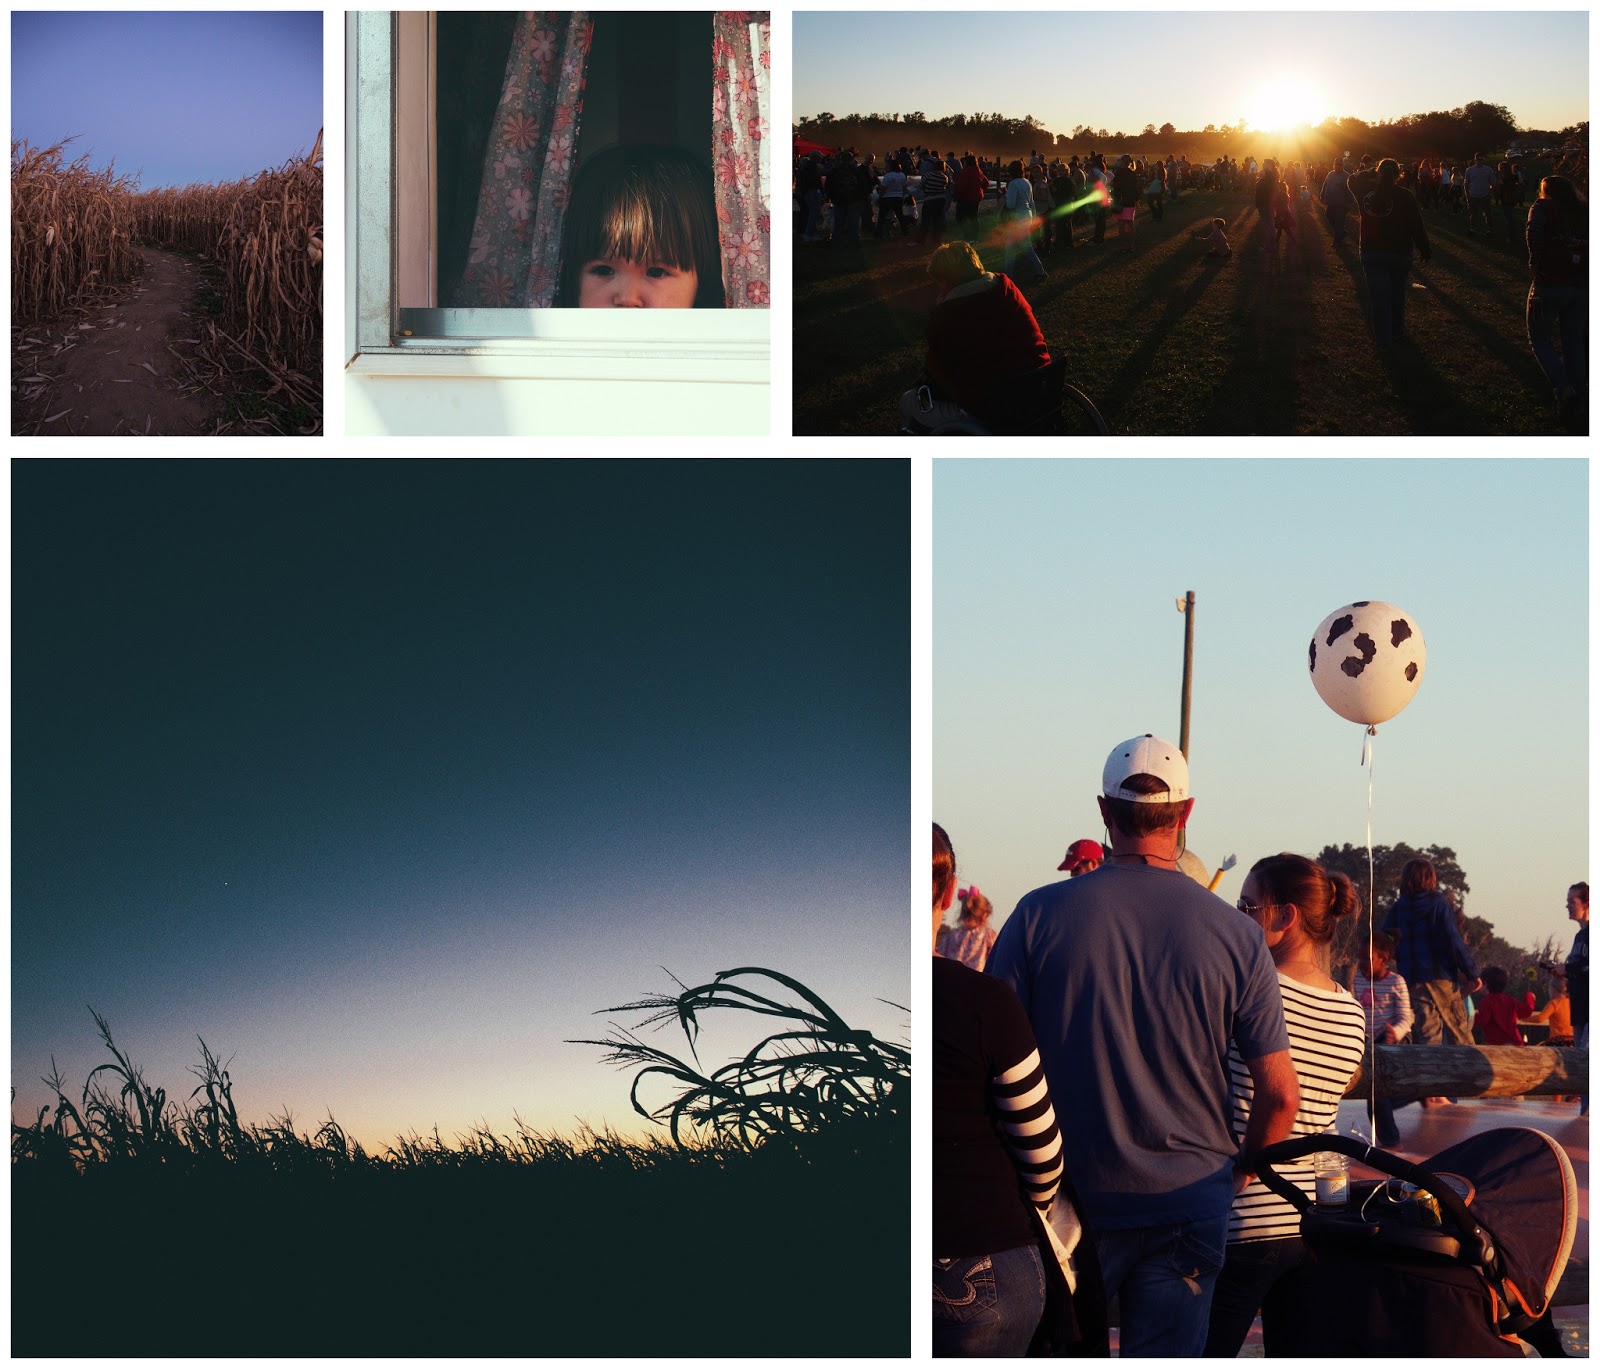
Here are the results of running each of these against my 5 test images:
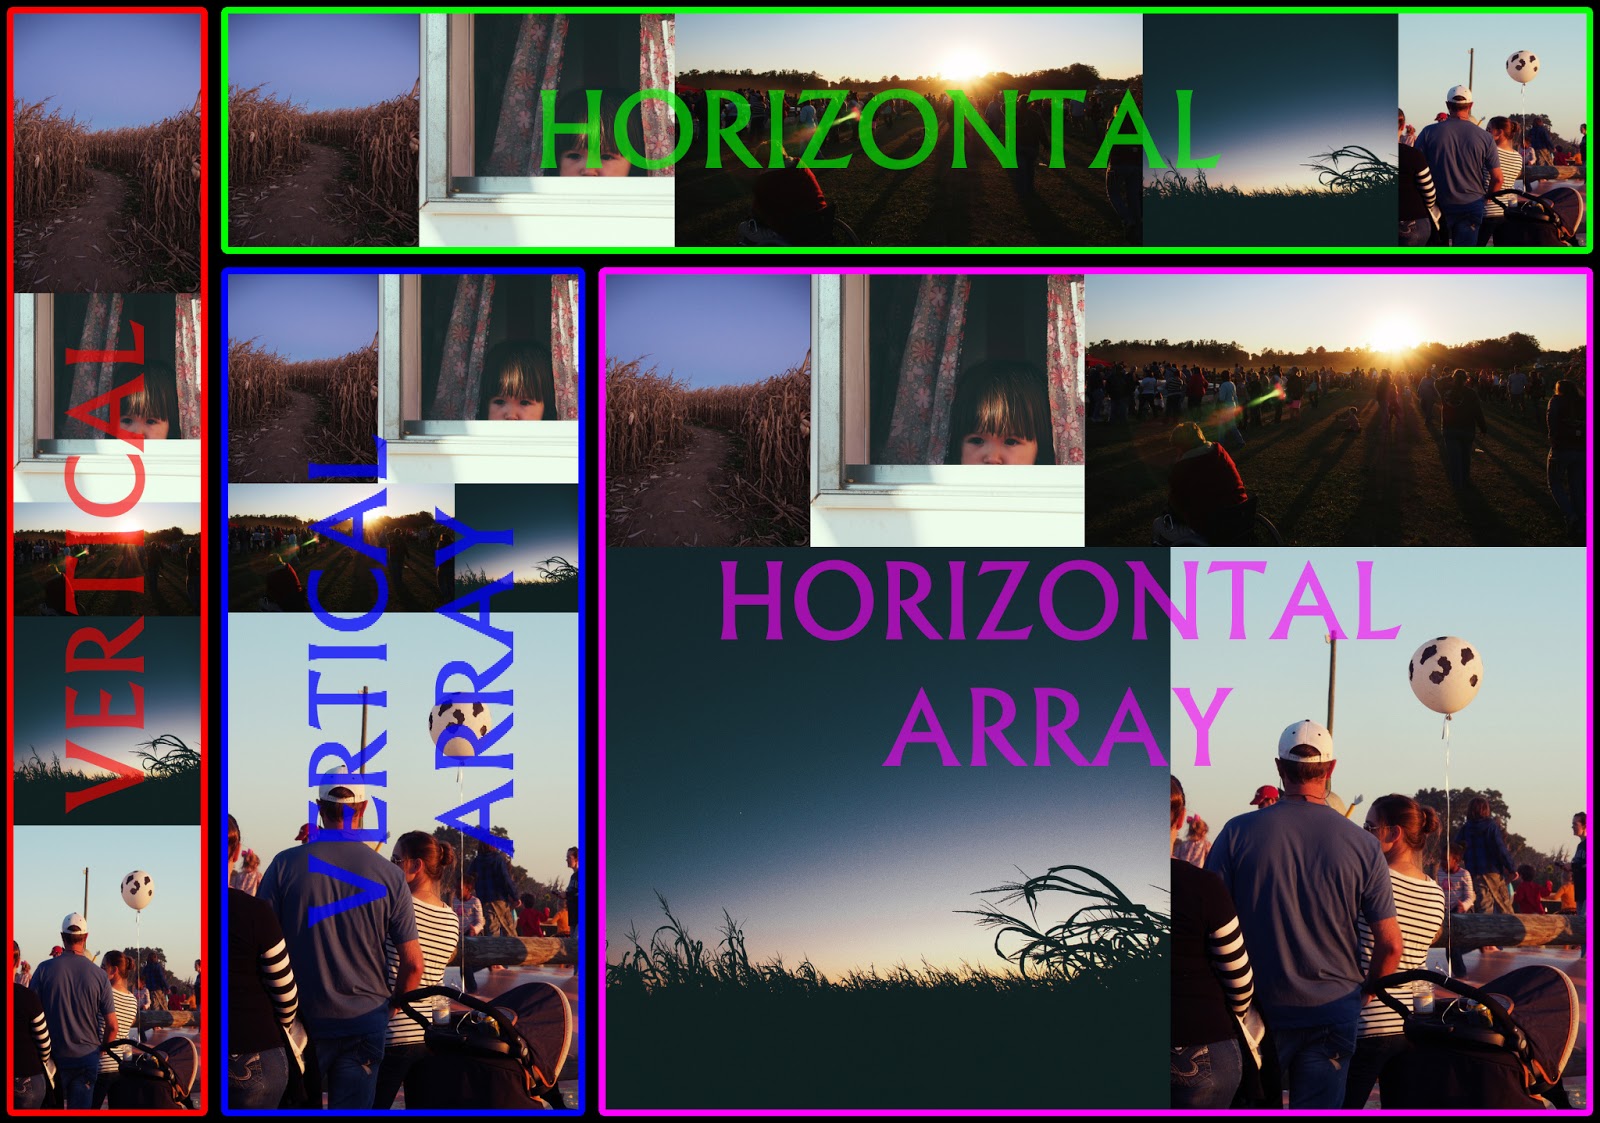
Horizontal, Vertical, Vertical Array, and Horizontal Array
If one of these orientations will work for you, then you’re all set! If you want more control on how the images are arranged, I go over it a little later.
Merging mode
This parameter has two options: Aligned and Scaled.
The Aligned option will not resize any of the images, and will only align them.
The Scaled option is the one I am most interested in here. This option will automatically scale the images DOWN to fit them in their orientation if the Alignment/scale factor is 0.5 or below. You can have the images upscale as well if you want by increasing the factor greater than 0.5. I personally try to avoid all upscaling, so I leave it at the default (0.5):

Horizontal montage, scaling to least height automatically (Scaled merging).
Horizontal montage, Aligned merging (no scaling).
Padding
There is also a great option to adjust the padding between images when creating the montage. This value is in pixels. Super handy to allow some space between your images:
Horizontal array with 20px padding between images
Frame
There is also an option to include a colored frame around each of the individual images if you want (I don’t personally use this option - but it’s nice that it’s there!).
Cycle layers
This is a nice option to automatically rotate the images in the stack (effectively swapping through which images belong where).
Output as
This is a very handy option for those of us who may like to fiddle even more after generating the montage. You can output the entire montage as a single layer or as multiple layers for further adjustments (I used this option to move layers around in the first image so I could place text on the canvas).
Custom Layout
Ok, so a quick explanation of how to define your own custom layouts is in order, I think. It may seem daunting at first, but I promise it’s not as bad as it looks!
The command for a custom layout is built up from two things: an identifier for orientation (V or H), and an index number for the image.
It helps to always think of it in terms of two “spaces” where you can add images. So if you were working in a horizontal orientation, you’d have two spaces to designate images (or sub nests) left and right.
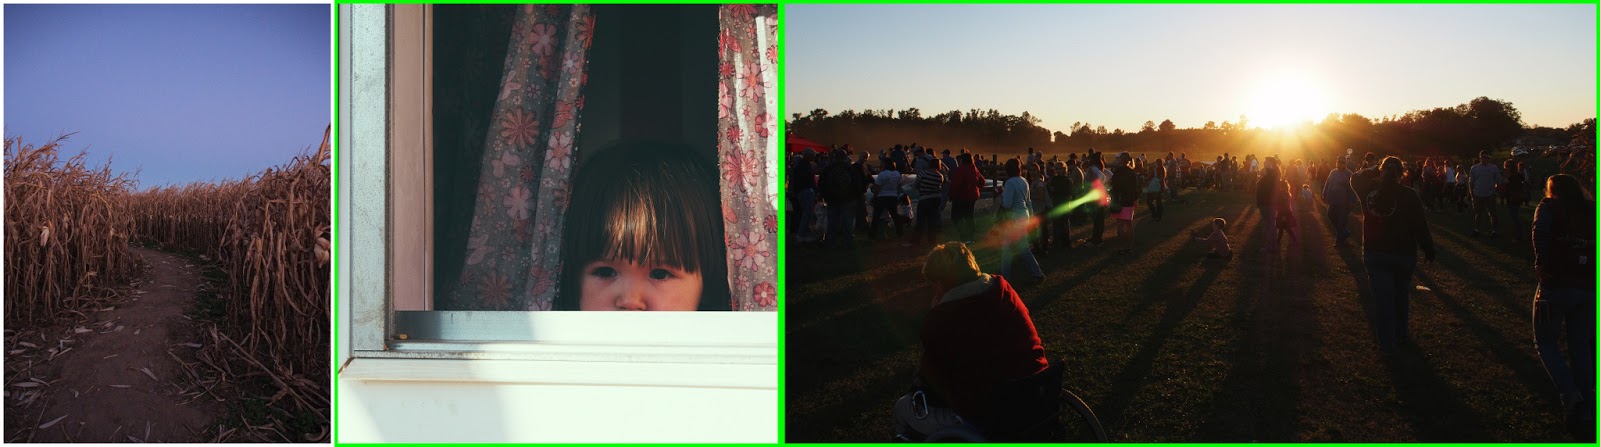
For instance, let’s start simply and create a simple 2 image horizontal layout. Assume we want to use images 0 and 1 from our list. We would type the following into the Custom layout input in G’MIC:
H(0,1)
In my case, this would produce:
Custom parameter: H(0, 1)
Now, what if we wanted to have a third image in this row? We would just add another horizontal orientation in place of one of the images. So, if we replace the second image in the command with another horizontal layout we would then have 3 images in a row:
H(0, H(1, 2))
Custom parameter: H(0, H(1, 2))
As you can see, it helps to think of it in pairs. The first command said, put image 0 first, then for the next image, use the horizontal layout of images 1 & 2 (in green).
If we wanted, we could instead have said that we wanted the images on the right to be vertically fit by changing the second H to V:
H(0, V(1, 2))
Custom parameter: H(0, V(1, 2))
Of course, you can sub-nest these layouts as deep as you’d like. So to continue the example, if we wanted to have the bottom right image from above actually be another two images in a horizontal orientation:
H(0, V(1, H(2, 3)))
Custom parameter: H(0, V(1, H(2, 3)))
If you’re ever unsure of which image is which index number, just refer to the G’MIC preview window. The image indices are visible over the images they belong to (super helpful). You can always switch over to horizontal or vertical layout to get an overview of the images that are loaded up.
(New!) Rotation
This is the only problem with working with someone like David… He’s usually working too quickly and adding stuff faster than I can write posts about it! Since I started writing this post, he has already added a neat little feature to the custom code that allows you to rotate any arbitrary image or block by prepending an “R” to it’s section.
Using the 3 image montage from above ( H(0, V(1, 2)) ), but adding an R in front of the vertical block yields:
H(0, RV(1, 2))
To rotate again, just add another R in front:
H(0, RRV(1, 2))
Conclusion
I don’t often arrange my images like this, but I’m not sure if it’s more because I’m too lazy to manually arrange them or not…
I did look around to see if there were other options briefly after David wrote this, and found something called BlogStop. Apparently this is a piece of commercial software to create a montage and includes some sort of blogging integration. It’s also a $49USD piece of software! So consider a small donation to David if you’ve got a few spare bucks around - I know it makes him happy (I’m pretty sure he’s using donations to buy hot chocolates in his lab while he works…).