Getting Around in GIMP - Black and White Conversion (Part 3)
In the first part of this tutorial we had a look at using the Desaturate command to convert images to grayscale. The second part of this tutorial examined the use of Channel Mixer to adjust the contributions of each Red, Green, and Blue channel to the final grayscale result. This part of the tutorial will focus on decomposing the entire image to its component parts for (possibly) further manipulations.
The rest of the tutorials in this series are here:
- B&W Conversion - Part 1 (Desaturate)
- B&W Conversion - Part 2 (Channel Mixer)
- B&W Conversion - Part 4 (Pseudogrey/c2g/Layers)
- B&W Conversion - Part 5 (Putting it All Together)
To get a good grasp of what we are about to do, it helps to remember the very first part of this tutorial when we looked at what goes into producing a color pixel on your screen (you remember the R, G, B sub-pixels, right?).
Decomposing Colors
Previously, in the Channel Mixer we saw that we can adjust the contribution of each of the RGB channels to our final grayscale conversion. From that post, you should have seen that you can isolate a specific channel by setting its value to 100, and leaving the others at 0.

Chad White by Ryan Abel on Flickr (CC-BY)
If you wanted each of the RGB channel contributions isolated into its own layer, it would be tedious to do it manually for each channel. Luckily for us, GIMP has a built in command to automatically Decompose your image into different channels:
This command will let you decompose your image into each of its constituent channels.
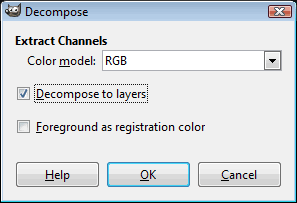
The Decompose dialog.
The options you have to choose from include the Color model to decompose to, and whether to create a new image with the decomposed channels on layers. If you don’t check Decompose to layers you’ll end up with a new image for each channel (chances are you’ll want to start out leaving this checked).
The most important option is which Color model you’ll want to decompose to. Up to now we’ve mostly been focusing on RGB, but there are other modes that might be handy as well. Briefly, the modes most useful might be:
RGB(A)
This is the Color mode that we’ve been focusing on mostly up to now, and is usually the most helpful in terms of having multiple sources to draw from. This will separate out Red, Green, and Blue Channels into layers for you (and Alpha if your image has it).
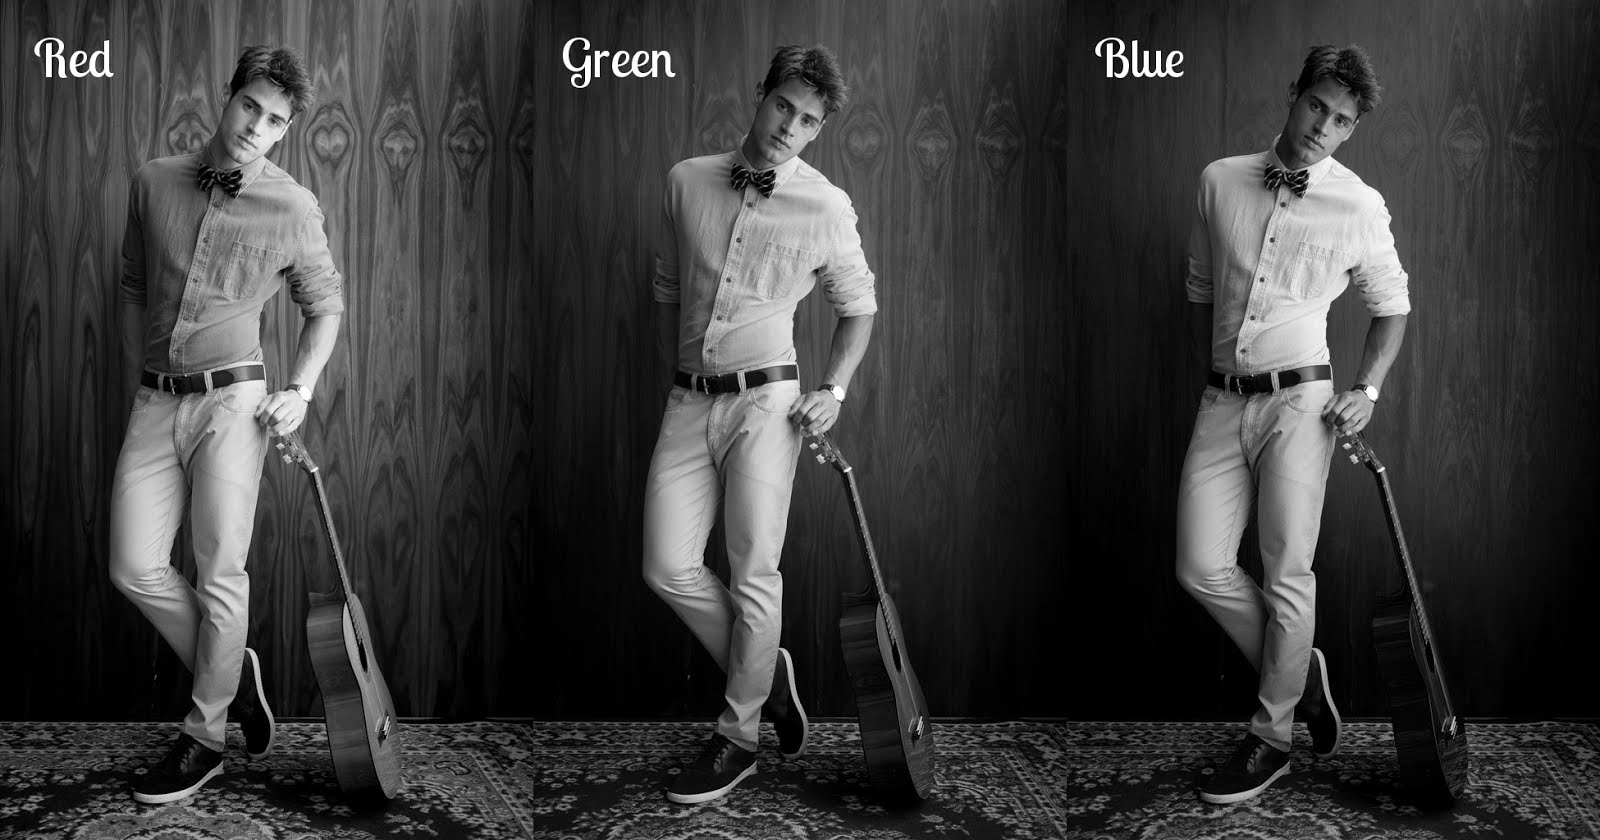
RGB decomposed (in order): Red, Green, and Blue
HSV/HSL
Hue, Saturation, and Value/Lightness is another useful decomposition, though usually only for the Value or Lightness for our purposes.
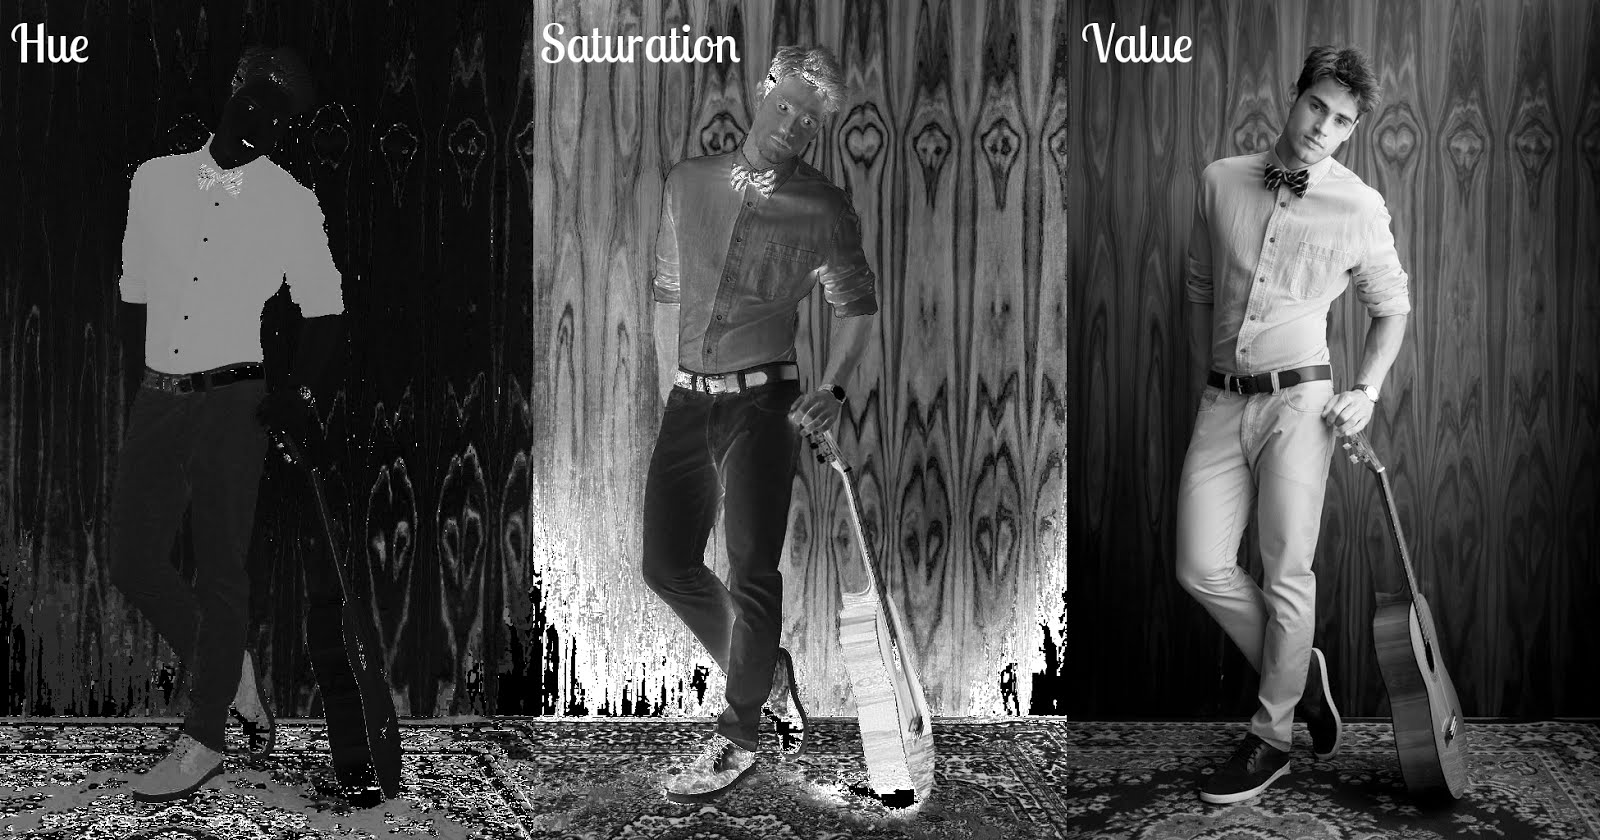
Hue, Saturation, Value (HSV) Channels
The Value in HSV is derived according to the formula:
Which is basically just the largest value of R,G, or B.
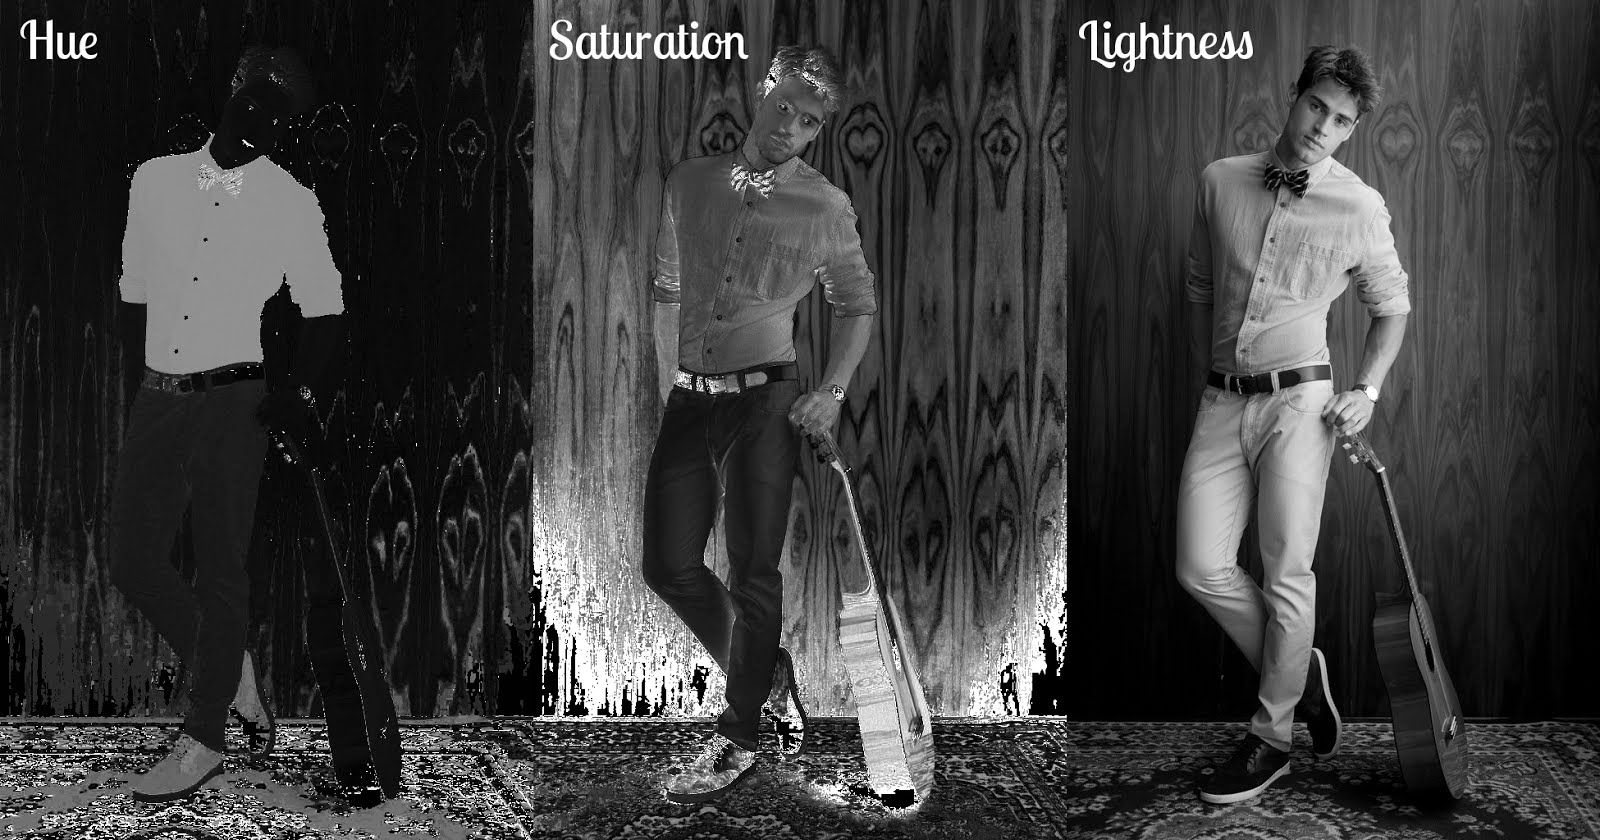
Hue, Saturation, Lightness (HSL) Channels
The Lightness in HSL is derived according to this formula:
Lightness is really just the average of the largest and smallest component of RGB.
While Hue and Saturation may seem interesting, it should be fairly obvious that the channels most useful for what we want to do would likely be Value or Lightness. Overall Lightness will tend to be a bit brighter than Value.
LAB
There is far too much information concerning the LAB colorspace to really go into much detail here. Suffice it to say that the L in LAB is for Lightness, while A and B are for color opponents (A = Green↔Red, B=Blue↔Yellow).
When I get out of the B&W world later, there are some neat tricks you can do in LAB colorspace for adjusting the color toning of your images I’ll try to cover.
The LAB colorspace is based on a perceptual model (similar to the relative luminance from the last post). In fact, the Lightness in LAB is calculated using the cube root of the luminance from that function.
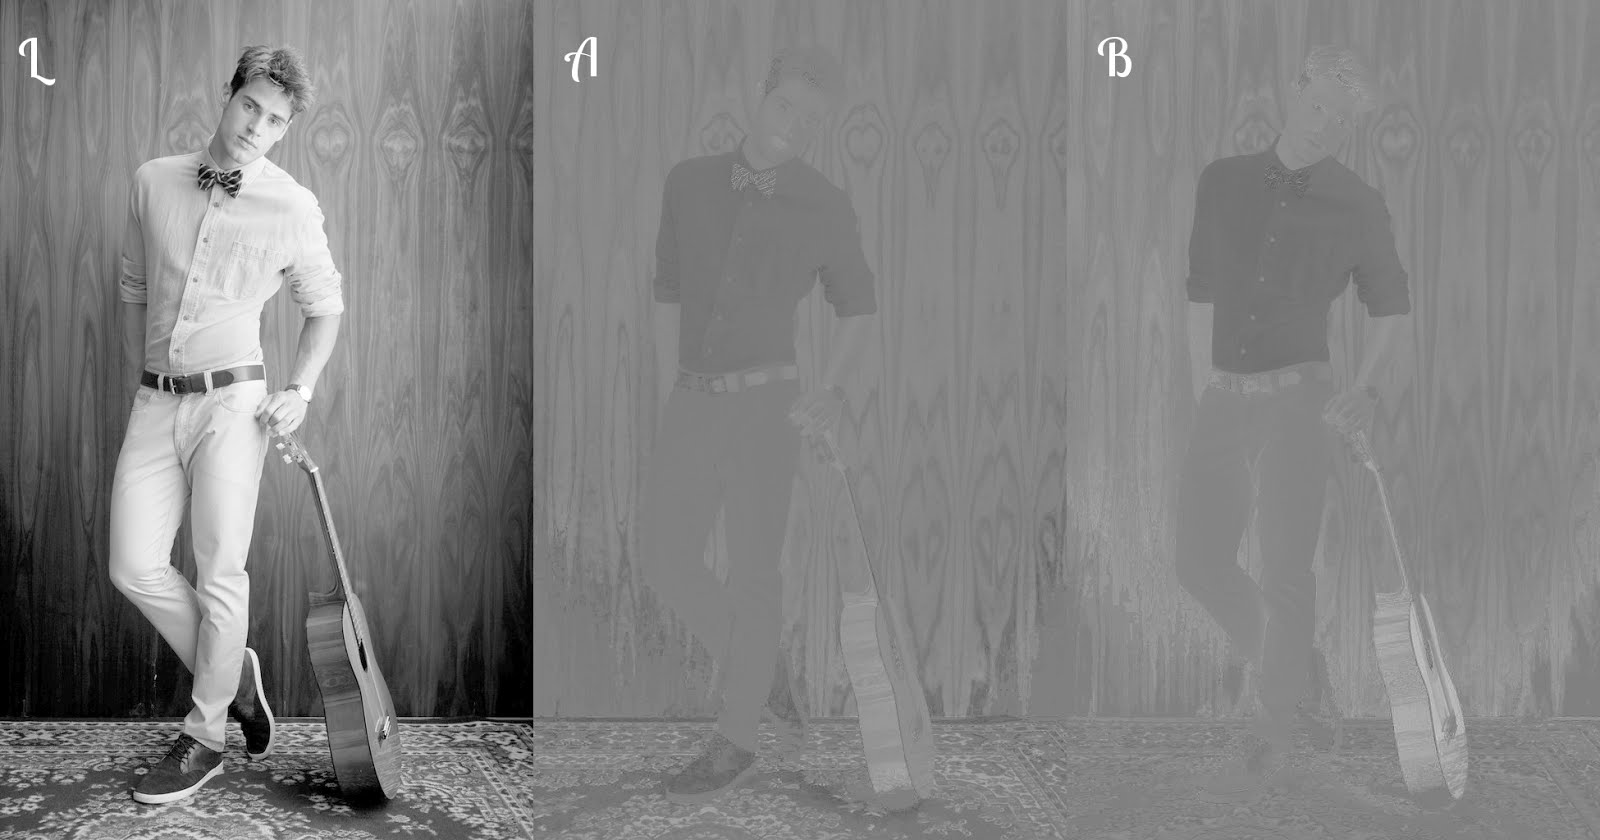
LAB Channels
As you can see, the only channel of any use for our B&W conversion is really the Lightness, L channel.
CMY(K)
Cyan, Magenta, Yellow and (K, Black) is often discussed in terms of printing, but can be useful in digital manipulations as well. In particular, the CMY conversion will produce three channels of Cyan, Magenta, and Yellow. When you do the decomposition in GIMP, you’ll need to invert the channel colors to really inspect what they produce (Colors → Invert).

CMY conversion (inverted from direct conversion)
CMYK produces a similar result, but adds another channel to control the level of black in the result. As with the CMY decomposition, you’ll need to invert the Black, K channel.
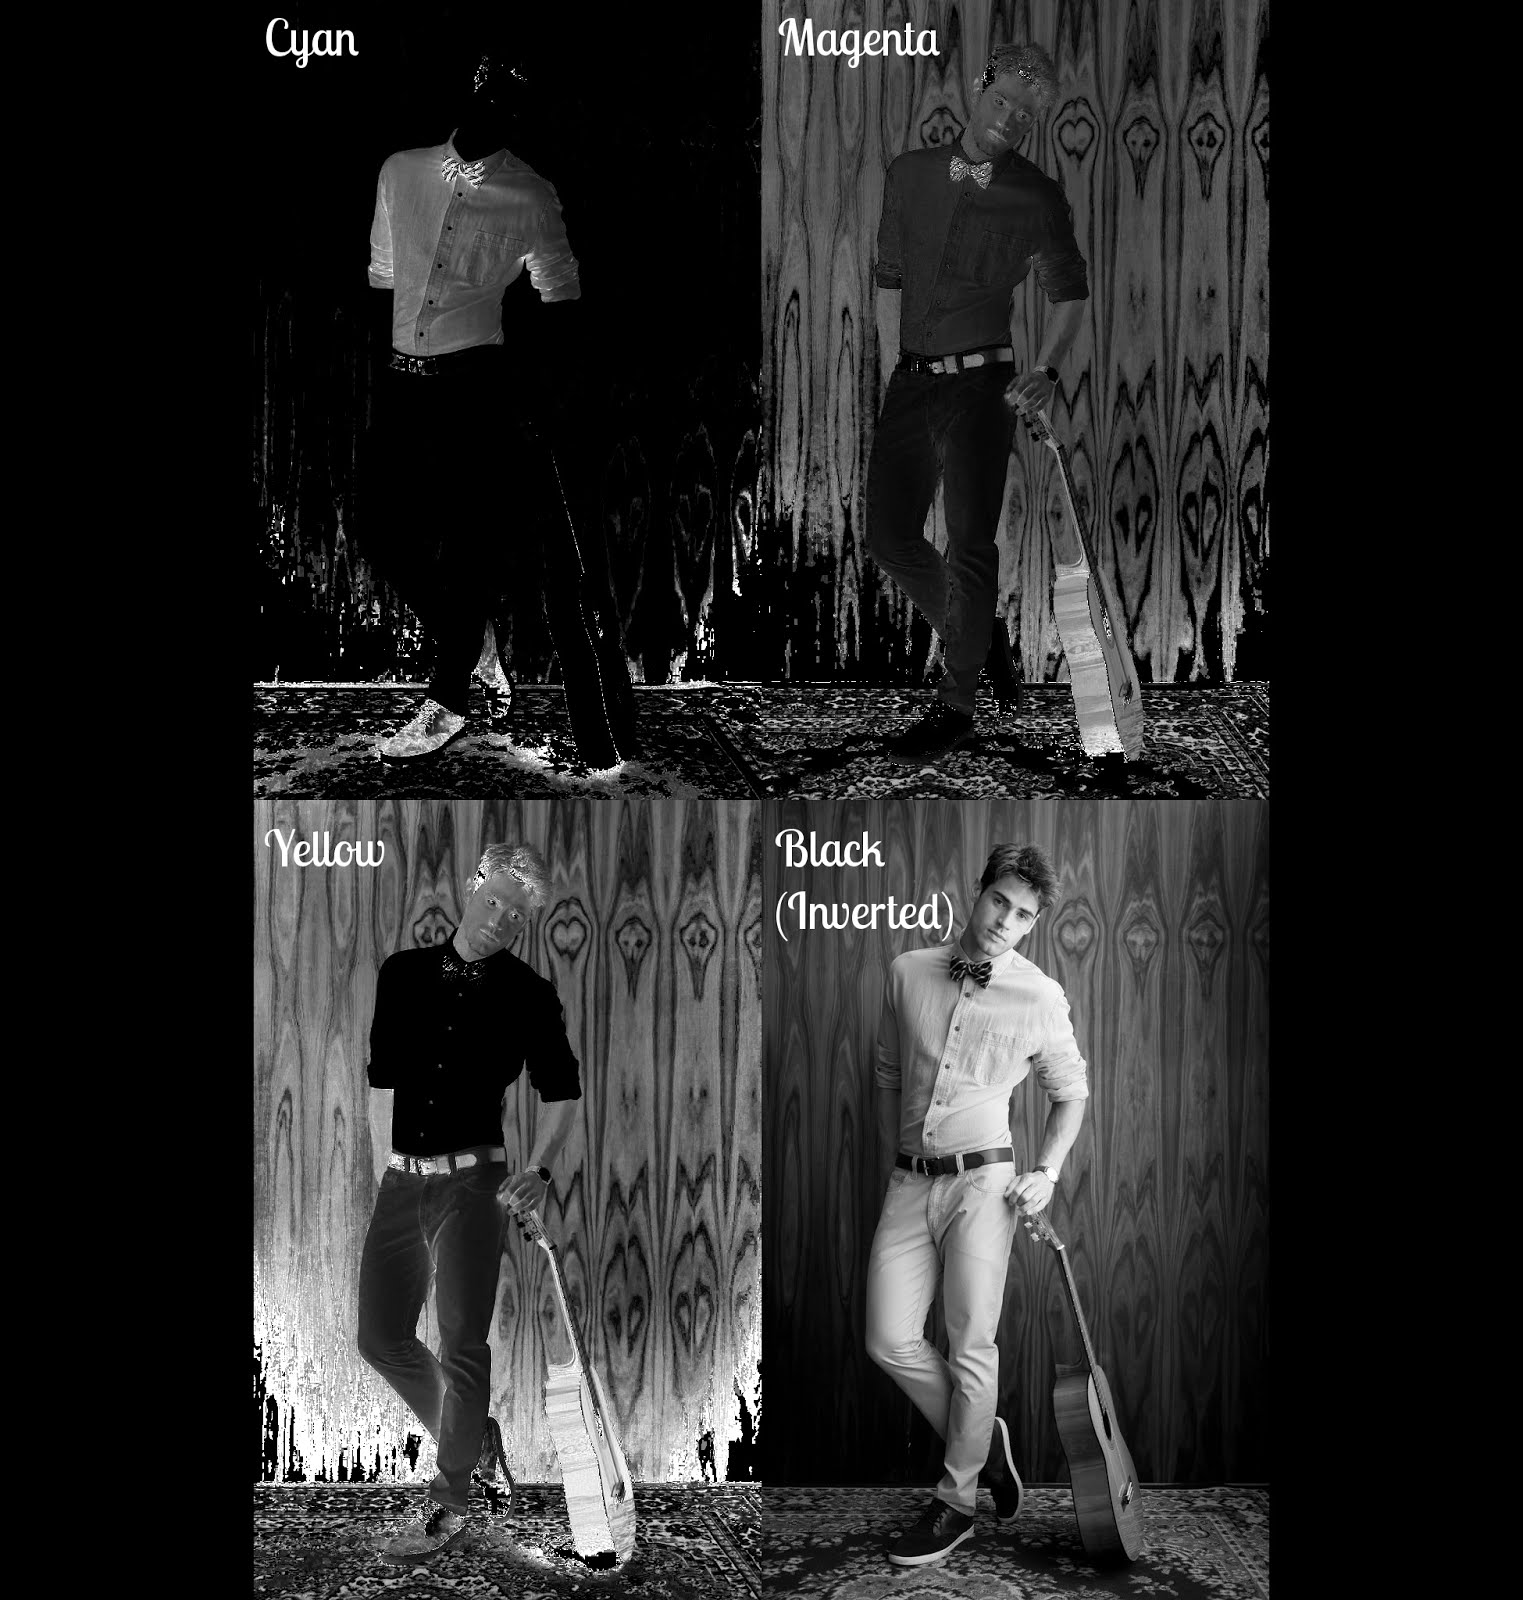
CMYK conversion, with the Black, K channel inverted.
YCbCr
Anyone who does video processing might recognize this colorspace representation, as it shows up often in digital video. YCbCr is a means for encoding the RGB colorspace, and produces three channels, a Luma, Y and two channels of Red (Cr) and Blue (Cb) chroma differences.
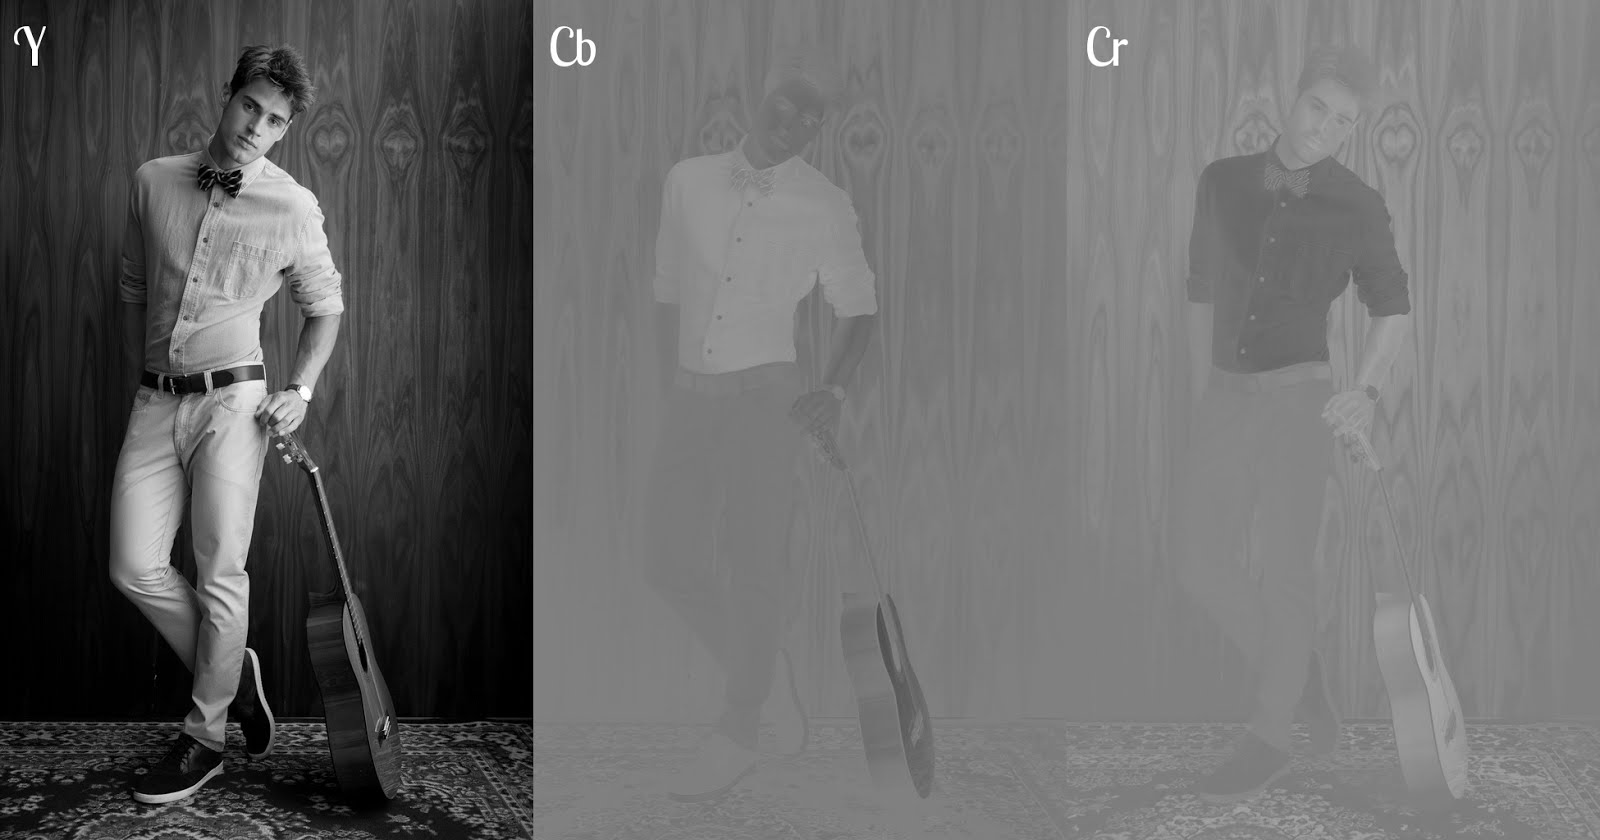
YCbCr (ITU R470 256) decomposition.
If you use this decomposition, try to use the 256 variants of the ITU recommendations to allow the decomposition to utilize the full 256 values available (the non-256 versions will pad 16 to the range - only allowing values to go from 16-240).
So Now What?
Having looked at this, let’s summarize some of the most useful Colors → Components → Decompose results:
- RGB - All
- HSV/HSL - V(Value) and L(Lightness)
- LAB - L
- CMY - All
- CMYK - K
- YCbCr - Y(Luma)
This gives us a total of 12 different types of color mode conversions that may be useful to us in generating a B&W image. It helps to visually be able to see all of the options at once to get a better feel for what is going on:
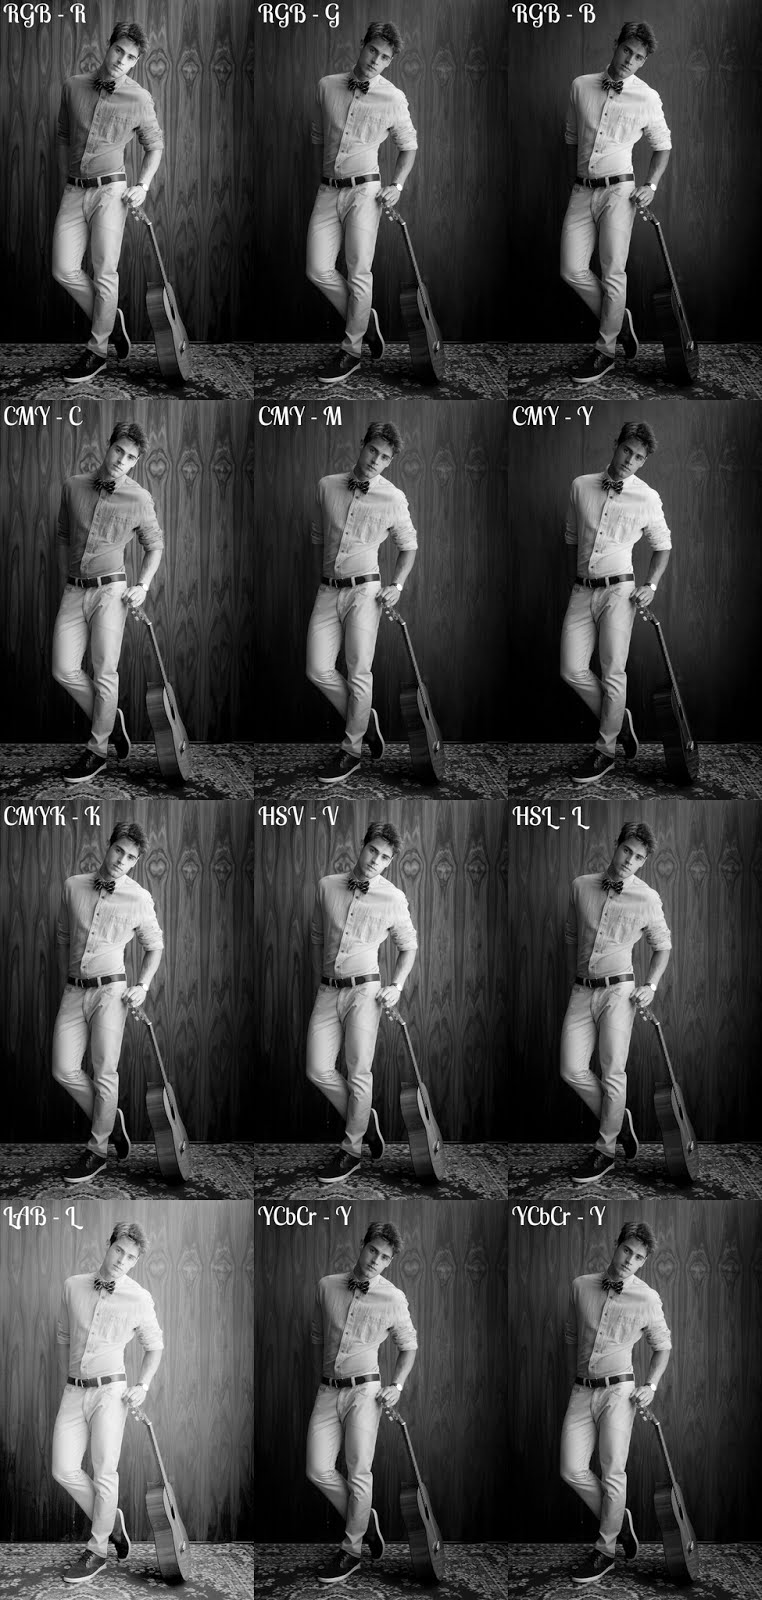
Chances are that one of these conversions might prove useful to you as a direct B&W conversion. If so - perfect!
Personally I am gravitating towards the Red channel, or the Cyan channel if I had to choose one. I like having the texture and tones of the shirt be a little darker to differentiate it from the pants. This is a very subjective call, of course. :)
It helps to notice that the first 6 conversions above are all color channels (RGB and CMY). This means that they will vary from image to image depending on dominant colors.
The last 6 conversions are all brightness values based on different functions for achieving the result (blacK, Value, Lightness, L, Y (luma)).
Looking Forward
Chances are better that some parts of some conversions will be useful. I personally am rarely satisfied with any of the straight conversion options on their own, but would like to pick and choose which parts of the image contain the best detail and tones from different conversion options (this includes any of the procedures we’ve seen up to now, by the way). Then I combine them as needed to fill out the tonal details in my final result.
Combining these methods that we’ve seen so far is the basis for the last part of this tutorial, so stay tuned!
The Script
While writing this post, I had to decompose our base image into each of the different channels to create images. It was tedious, having to choose each color model manually, and decomposing to another image with layers.
So I wrote a script to automate this process for me. It will basically take the active layer in an image, and decompose it to each of the useful color channels listed above, each as its own layer. (It will also invert some of the layers that need it).
Once you’ve placed it in your Scripts folder, the command can be found here:
Colors → Color Decompose…
You can find your Scripts folder by going to:
Edit → Preferences
Then from the Preferences dialog, down to:
Folders → Scripts
You can download the Script-Fu for Color Decompose here:
or you can download it here:
Stay Tuned
We’ve got Pseudogrey and Layer Modes coming up for other options to get you to your perfect B&W conversion! A little later we’ll see how to combine all the results we’ve seen so far into our final image for manipulation.
